![]()
![]()
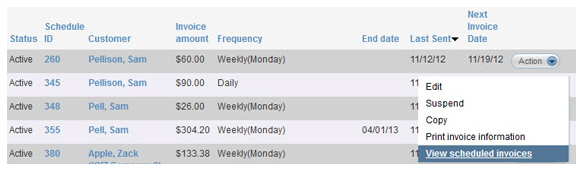
Using the “View scheduled invoices” link under the Action button you can view all of the invoices generated by a specific invoice schedule. From the scheduled invoices table, you can perform any task available in the manage invoices screen including printing, copying, canceling, deleting, collecting payment, and marking invoices as paid.
Follow the steps below to view invoices generated by an invoice schedule:
Locate the schedule for which you want to see invoice history in the Recurring Invoices table.
Click the Action button then click the “View
scheduled invoices” link.
NOTE: You will only see this link in
schedules with a Status of “Active” or “Expired.” However, you can
view a list of all invoices generated by any schedule, regardless
of status, by clicking the linked Schedule
ID.
The invoices for schedule # screen opens, as shown below.
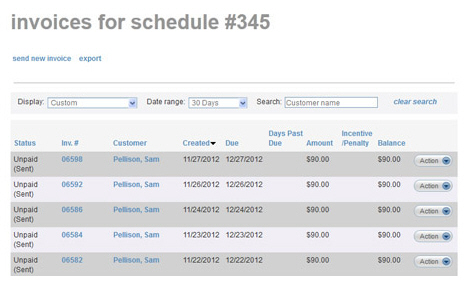
The screen functionality
is identical to the manage invoices
screen, except this screen only includes invoices generated
by the invoice schedule #
identified in the page title. (The invoice
schedule # is the Schedule
ID listed in the Recurring
Invoices table.)
From this screen you can:
Filter the list of invoices using the
Display status filter
(See
Filter by Invoice Status above)
or the Date Range filter.
(See Filter by Date Range above.)
NOTE: The Search customer filter is disabled on this
screen because all invoices in a schedule are sent to the same
customer.
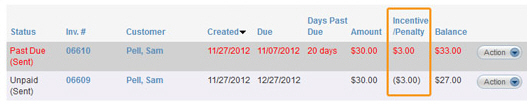
View the incentives and/or penalties currently active on an Unpaid or Past Due invoice, or view the actual discount provided or penalty assessed on a Paid invoice.
Collect a payment for an “Unpaid,” “Paid (partial)” or “Past Due” invoice, by clicking the “Collect payment” link under the Action button menu. (See Processing Payments for Specific Invoices above.)
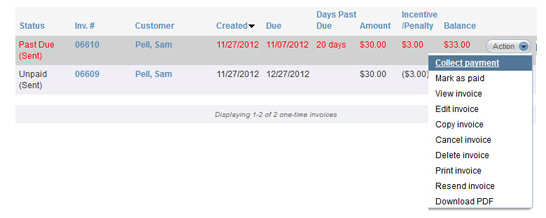
Mark an “Unpaid,” “Paid (partial)” or “Past Due” invoice as paid, by clicking the “Mark as paid” link under the Action button menu. (See Marking Invoices as Paid above.)
Mark a “Paid” or “Paid (partial)” invoice as unpaid by clicking the “Mark as unpaid” link under the Action button menu. (See Marking Invoices as Unpaid above.)
View any invoice by clicking the “View
invoice” link under the Action
button menu. (See Viewing Invoices above.)
NOTE: You are also able to see
a record of when the invoice was emailed from the View Invoice screen.
Edit any unpaid invoice (Status of “Unpaid”
or “Past Due”) by clicking the “Edit invoice” link under the Action button menu. (See
Editing
Unpaid Invoices above.)
NOTE: Any changes you make to an
individual invoice generated by a schedule will not affect the
schedule or any future invoices generated by it.
Copy any invoice by clicking the “Copy invoice” link under the Action button menu. (See Copying Invoices above.)
Cancel an “Unpaid,” “Paid (partial)” or “Past Due” invoice by clicking the “Cancel invoice” link under the Action button menu. (See Cancelling Unpaid Invoices above.)
Delete any unpaid invoice (Status of “Unpaid” or “Past Due” or “Cancelled”) by clicking the “Delete invoice” link under the Action button menu. (See Deleting Unpaid Invoices above.)
Print any invoice by clicking the “Print invoice” link under the Action button menu. (See Printing Invoices above.)
Resend any invoice by clicking the “Resend invoice” link under the Action button menu.(See Resending Invoices above.)
Download a .pdf of any unpaid invoice (Status of “Unpaid” or “Paid (partial)” or “Past Due”) by clicking the “Download PDF” link under the Action button menu. (See Downloading Invoices As PDF Files above.)
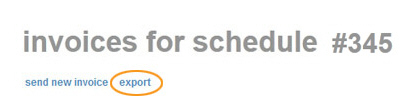
Export the list of invoices generated by the schedule by clicking the “Export” link, as shown below. (See Exporting Invoice History above.)
Click the “Back to list of recurring invoice schedules” link to close the page and return to the manage recurring invoices screen.