![]()
![]()
Follow the steps below to enter a recurring billing schedule.
Navigate to the Payments--> Collect New Payment screen by clicking the “Collect Payment” Quick Link in side navigation.
Search for and load an existing customer, or enter a new one. (See Loading and Entering Customers for New Payments and Schedules above.)
In the right-hand section, shown below,
you will always see three standard fields, all of which are optional:
Invoice number, P.O.
number, and Payment description.
NOTE: Custom fields are not available
for recurring payments. If you enter values in custom fields, they
will be removed when you select “Recurring billing” or “Payment plan”
in the Payment
type field.
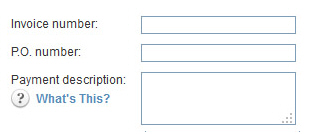
Invoice number: Your invoice
number for the payment schedule. (This can be any value you like
and a maximum of 50 characters.) The same invoice number will
be used for each payment generated by the schedule.
NOTE: If you enter a system invoice
number in this field, and the number is attached to the loaded
customer, each payment in the schedule will be attached to the
indicated invoice. As the payments are authorized, a corresponding
amount will be deducted from the invoice “Balance Due.” When the
first payment is processed, the invoice status will be changed
to “Paid (partial).” When all payments have been processed at
the end of the schedule, the invoice status will change to “Paid.”
P.O. number: Your customer's P.O. number for the payment schedule. (Maximum 50 characters.)
Payment description: Enter any short text description or message. (Maximum 250 characters.) This description will appear on the Transaction Details screen as well as on schedule confirmation emails and receipts.
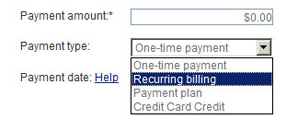
Select “Recurring billing” from the Payment type drop-down box, as shown below:
The Recurring billing configuration section appears as shown below:
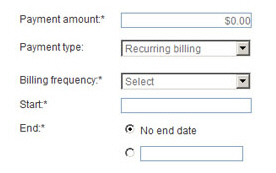
In the Payment amount field, enter the amount to be collected. Enter a number using a format of 0.00. Do not include the $—The system will add it for you.
In the Billing frequency field, select how often your customer will be billed:
Daily
Weekly-- A new drop-down box will appear in which you should select the day of the week to bill.
Every-other-week-- A new drop-down box will appear in which you should select the day of the week to bill.
First of month
Specific day of month-- A new
drop-down box will allow you to select the day of the month to
bill.
NOTE: If you want to bill on the
30th or the 31st, select the “Last of month” option instead of
the “Specific day of month” option to avoid confusion in short
months like February.
Last of month
Quarterly-- If you select this option, the system will bill every 3 months on the day of the month used for the schedule start date.
Semi-Annually-- If you select this option, the system will bill every 6 months on the day of the month used for the schedule start date.
Annually-- If you select this option, the system will bill every year on the month and day used for the schedule start day.
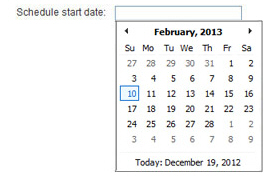
Place your
cursor in the Start field
to open the calendar. Select the day you want the schedule to begin.
Use the arrows to the left and right of the month to scroll through
the calendar one month at a time.
NOTE: You must select a Start date that matches the selected frequency.
For example, if your schedule runs on the first of each month, you
can pick a Start
date of February 1 or March
1, but not March 2. If you select the current day, your customer will
be charged for the first payment in the schedule immediately after
the schedule is saved.
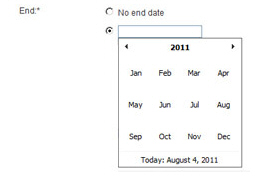
The No
end date radio button is selected by default in the End field. With this setting
the schedule will run until you manually suspend it. To enter a specific
end date, select the specific end date radio button and click the
field to select an end date from the calendar.
Click the month, year heading
at the top of the calendar to get a full year view, as shown above.
Advance years by using the left and right arrows, then click on the
month to open the calendar page where you can select a specific day.
Enter a Custom first payment. (Optional) A custom first payment must occur BEFORE the first payment in the schedule. Custom first payments are typically for one-time payments of the same or different amount from the scheduled amount. For example, you might use a custom first payment to collect a set-up fee, and then use the schedule to collect monthly usage fees.
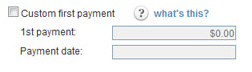
To enter a Custom first payment:
Select the Custom first payment checkbox.
Place your cursor in the Payment
date field, and use the pop-up calendar to select
the date your customer will be billed.
NOTE: If you select the current day,
the payment will be processed when the schedule is saved.
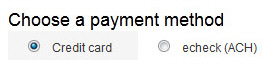
Select
Credit card or echeck (ACH) in the Choose
a payment method section.
NOTE: You will only see one option here
if your account is configured for only Credit Card or only echeck
(ACH) processing, in which case you will not need to make a selection.
Select the credit card or bank account you want to use, or enter a new one.
Credit Card: (See Using Credit Cards for New Payments and Schedules below for detailed instructions.)

If using an existing card, select its
radio button in the Use column,
ask your customer for the card’s CVV2 code and enter it in
the CVV2 Code field.
NOTE: The default credit card
will be automatically selected. (See
About Default Payment Accounts in
Chapter 6
for details on setting and changing the default credit card
account.)
If entering a new card, enter values
for Card type, Card number, CVV2
Code, Billing Zip/Postal
Code and Expiration
date in the fields located under the saved cards
table.
NOTE: Entering the CVV2 Code
is optional. CVV2 validation is used as a security measure
to verify that the customer has the card in hand when authorizing
the schedule. It will only be validated if the first payment
on the schedule or the custom first payment will take place
on the current day. The system will NEVER store the CVV2 code,
so it cannot be validated on future transactions.
NOTE: If you want the new card to be the default account, check
the Set
as default account box.
If
swiping a card for an in-person transaction, click the “swipe
card” button to open the swiper box, swipe the card, make
sure its details are visible in the box, and confirm/enter
the Billing Zip/Postal Code
before proceeding.
NOTE: For detailed instructions
on using the card swipe function, see About Credit Card Swipe Transactions.
NOTE: All scheduled payments will be processed as MOTO, even
if your account supports Retail transactions and you swiped
the credit card. This is because track data cannot be stored
and used at a later date as part of a scheduled payment. Thus,
when you swipe the card, the system extracts the card type,
card number, and expiration date and securely stores it as
part of the Customer Record, then uses that information to
generate transactions on the schedule you specified.By entering
the Billing
Zip Code, you enable
the AVS verification to run which ensures that you are charged
the lowest possible transaction processing rate. (See Using AVS Match in Appendix A.)
echeck (ACH): (See Using Bank Accounts for New Payments and Schedules below for instructions.)

In the echeck (ACH) type drop-down box, select the type of ACH transaction for which you have obtained authorization. (See Appendix A: Authorizing Transactions for more information on ACH types.) The following Types are appropriate for recurring transactions:
PPD-- Written (You have a signed authorization from your customer.)
TEL-- Telephone (Your customer authorized the schedule over the phone.)
WEB-- Website (Your customer authorized the schedule via a form on the Internet.)
CCD-- Company (This
is a schedule authorization between two companies, and
you have an overriding agreement with the other company
for ACH transactions.)
NOTE: Many business checking
accounts are not enabled for ACH transactions. Before
entering a CCD schedule, make certain that your customer
confirms that the account is enabled for ACH. If it is
not, you may be assessed Return fees and/or Chargeback
fees.
For a
saved account, select the radio button in the Use
column for the account you want to charge.
NOTE:
The default bank account will be automatically selected.
(See About Default Payment Accounts in
Chapter 6 for
details on setting and changing the default bank account.)
For a new account, enter the
Bank name, Bank routing number,
Bank account number,
and Account type in
the fields located under the saved accounts table.
NOTE: If you want the new
account to be the default bank account, check the Set as default
account box.
Review the Email Receipt settings for the schedule and make any required changes. The settings in this section are based on the Receipt and Notification settings you set in the Settings--> Configuration--> Email Preferences and Templates screen. (See Email Preferences and Templates in Chapter 8 for details on how to configure receipt settings.)
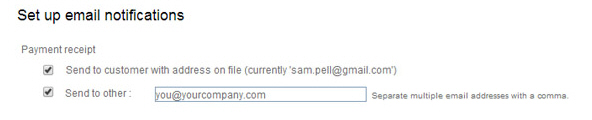
Depending on your default settings, you can:
Check or un-check the first and/or second box if you don’t want to send the receipt to that email address.
Enter
a different email address in the Send
to other field, or add an additional address to the
field. You can enter multiple addresses separated by commas. (Maximum
200 characters)
NOTE: If you have also elected to
send a receipt to the customer, the email address(es) entered
in the Send
to other field will
be the email CC addresses. If the “send to customer” box is not
checked, then email addresses in this box will be placed in the
email To field.
Review
the failed payment notification settings, and make any required changes.
The settings in this section are based on the Receipt
and Notification settings you set in the Settings-->
Configuration--> Email Preferences and Templates screen.
(See Email Preferences and Templates in Chapter 8 for
details on how to configure receipt settings.)
NOTE: The system will automatically select
the correct receipt to send based on the payment type (credit card/ACH)
and sub-type (MOTO/Swipe or PPD/TEL/WEB/CCD).

Depending on your default settings, you can:
Check or un-check the first and/or second box if you don’t want to send the failure notification to that email address.
Enter
a different email address in the Send
to other field, or add an additional address to the
field. You can enter multiple addresses separated by commas. (Maximum
200 characters)
NOTE: If you have also elected to
send a failure notification to the customer, the email address(es)
entered in the Send
to other field will
be the email CC addresses. If the “send to customer” box is not
checked, then email addresses in this box will be placed in the
email To field.
Review the Pre-Notification Email settings. The settings in this section are based on the Receipt and Notification settings set in the Settings--> Configuration--> Email Preferences and Templates screen. (See Email Preferences and Templates in Chapter 8 for details on how to configure pre-notification settings.)
Depending on your default settings, you can:
Un-check
the Send schedule notification
box if you don’t want to send the pre-notification email.
NOTE: The pre-notification email
is always sent to the customer’s primary email address.
Select a different number of Days Prior to the payment date for the pre-notification email. You can select any number of days from 1 through 10.
|
CALCULATING PRE-NOTIFICATION EMAIL DATE The pre-notification email is sent based on the Days Prior setting you select and the scheduled payment date. For example, for a payment scheduled for January 8, pre-notification emails would be sent as follows:
|
Click the “create recurring payment” button at the bottom right of the screen to save and activate the schedule. Or click the “cancel” button to discard it. (See System Actions Upon Activating a Recurring Payment Schedule below for what happens when a schedule is saved.)
If there are any errors with the schedule, you will see the error displayed at the top of the screen, as shown below. You can then make corrections and re-submit the schedule, or discard it.

When the schedule is saved, the manage recurring payments screen will open. There will be a message above the table verifying that the schedule was successfully entered. The new schedule will be at the top of the Recurring Payments table, as shown below:
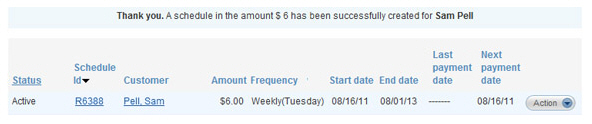
At this point, you can view schedule details by clicking the linked Schedule Id (This view also contains a list of all transactions generated by the schedule.), or suspend the schedule by selecting “Suspend” under the Action button menu.
You can also delete any schedule that has not yet started. And, you can edit recurring billing schedules, either before or after they have started, by selecting the “Edit” link under the Action button menu.
See the following sections for detailed instructions on performing these tasks:
