![]()
![]()
Your ReceivablesPro account is configured with a default Web Payment Page that is ready to use out of the box. You’ll see it in the WEB PAYMENT PAGE TEMPLATES table, when you access the Settings--> Web payment pages tab.
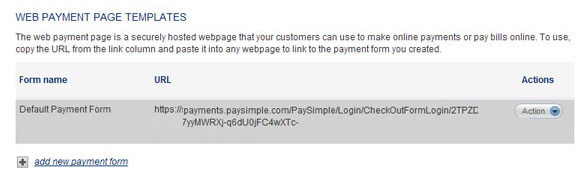
You can begin accepting online payments immediately, by copying the link in the URL column, and using it in a web page. You can also use any of the linking methods described in the Link to a Web Payment Page section.
Additionally, you can export the default Web Payment Button, which is attached to the default Web Payment Page, and paste it in your web pages and emails. (See The Default Web Payment Button and Export a Web Payment Button for instructions on how to do this.)
The system uses default colors and the contact information you configured for your ReceivablesPro system to create the default Web Payment Page (See Add a Web Payment Page for detailed information on each section of a Web Payment Page.) The following settings are used:
The User ID attached to the form is the Master Administrator User.
There is no header logo.
The Page title is “Payment Form.”
The form
accepts payment via Echeck (ACH), American Express, Visa, MasterCard,
and Discover.
NOTE: If your account is not configured
for all of these payment types, your payment form will only accept
the types of payment supported in your system.
The Invoice # is included on the form.
The Recurring billing schedule radio button is set to “none.” This means the form can be used for one-time payments only.
The Terms and Conditions use generic default text that is appropriate for most merchants.
|
It is strongly recommended
that you review and edit the default Terms and Conditions
prior to using the default web form. It is a good idea to
add a specific description of the products and services sold
via the form, as well as to clearly define your company’s
return, cancellation and refund policy. |
The Payment amounts field is set to “User defined amount” which means that your customers can enter the amount they want to pay on the form. (See Add a Web Payment Page for details on how to create payment forms with a fixed amount.)
Shipping address fields are not included.
The Payment button text is “Pay.”
The Font is “Arial.”
Black is used for all color settings, except the payment button text which is white.
For the login page, the Login logo is not included and the Accent color is grey.
The Contact Information fields use the information you entered in the Contact information section of the Settings--> Configuration--> Preferences screen.
To preview the payment form and the login page for the default Web Payment Page, point to the Action button and select the “Preview payment form” and “Preview Login Page” links respectively, from the list. (See Preview a Web Payment Page below for details.)
If you’re not happy with the defaults, you can edit the default Web Payment Page to better meet your needs. (See Edit a Web Payment Page below for instructions on how to do this.)
If you don’t want to
keep the default Web Payment Page you can delete it by selecting the “Delete”
link from the Actions button menu.
NOTE: If you delete the default Web Payment
Page there is no way to restore it. Deleting the default Web Payment Page
will also require that you first delete the default Web Payment Button
attached to it. (See Delete a Web Payment Page for
details.)
