![]()
![]()
Your ReceivablesPro account comes configured with a default Web Payment Button that is ready to use right out of the box. You’ll see it in the WEB PAYMENT BUTTONS table, when you access the Settings--> Web Payment Pages tab.
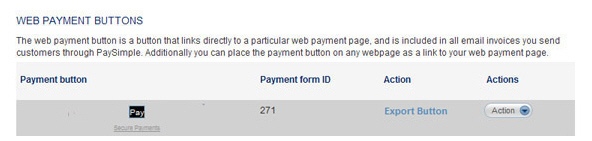
You’ll see a preview of how the button will look on a web page, in the Payment button column of the table.
The button is attached to the default Web Payment Page. (See The Default Web Payment Page above.) You can export it and paste it into a web page to begin accepting online payments immediately. Click the “Export Button” link in the Action column, copy the code in the pop-up window, and paste that code into your HTML page. (See Export a Web Payment Button below for detailed instructions.)
The system uses default settings for button configuration, as shown below:
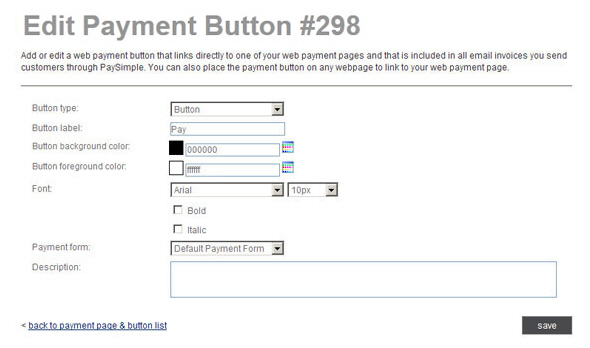
The Button type is a graphic “Button.”
The Button label is “Pay.”
The Button background color is black.
The Button foreground color (the button text color) is white.
The Font is Arial, 10px, plain.
The Payment form is the “Default Payment Form.”
If you’re not happy with the defaults, you can edit the default Web Payment Button to better meet your needs. (See Edit a Web Payment Button below for instructions on how to do this.)
If you don’t want to
keep the default Web Payment button you can delete it by selecting the
“Delete” link from the Action button menu.
NOTE: If you delete the default Web Payment
Button there is no way to restore it. If you have exported the default
Web Payment Button and are using it in a web page, deleting the button
from ReceivablesPro will
not affect the button function in the web page—as long as you have not
also deleted the default Web Payment Page. (See the Delete a Web Payment Button
section for details.)