![]()
![]()
Payment accounts entered via the Web-based UI are available for processing payments in the Mobile App. You can also add credit card and bank accounts to a Customer Record from the Mobile App. (See Adding Payment Accounts for New Payments and Schedules in the Customers section below.)
Additionally, you can add a payment account while processing a one-time payment or entering a recurring payment schedule or payment plan. There are two ways to do this: Swipe and Hand Entry. Swipe can only be used for adding credit cards. You can hand enter both credit card and bank account information.
When you swipe a credit card for a new customer, a Customer Record is created by extracting name, credit card type, credit card number and credit card expiration date from the card’s track data. If the customer already exists, or if you select a Customer Record prior to swiping the card, the system saves the credit card as a payment account for the Customer Record if it does not already exist. (If it does exist and the expiration date has changed, that is updated as well.) You can now select that credit card account when entering payments and schedules without having to swipe it again. (See Swiping a Card for New Payments and Schedules for detailed instructions.)
To hand enter a new credit card or bank account during the payment processing or schedule process, follow the steps outlined below.
To hand enter a credit card as part of the payment collection or schedule entry process, follow the steps below.
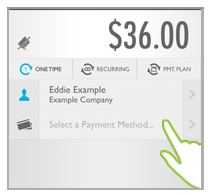
Tap Collect Payment in the Quick Menu to open the Collect Payment screen.
Enter the Payment Amount.
Select the payment type. (This example uses One Time, which is the default.)
Tap Select
a Customer to choose a customer to charge, or enter a new one.
NOTE: See Adding Customers while Entering Payments and Schedules for instruction on adding a new customer
or Collect Payment
for instructions on selecting an existing customer.
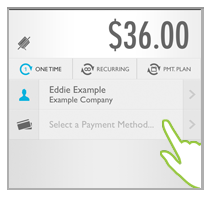
Tap Select a Payment Method... (or Swipe or Select Payment Method..., if you have a swiper installed.)
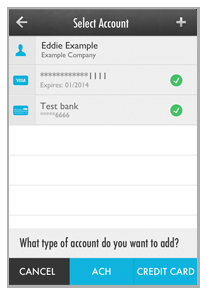
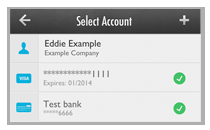
If there are accounts saved with the
customer they will be displayed
NOTE: The check marks in the green
circles denote the default credit card and default bank account.
You can change the default account from the web-based UI.

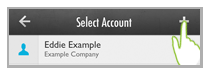
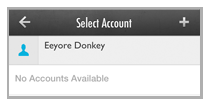
If no accounts are saved, that will be indicated as shown below:

Tap the + icon to the right of the Select Account header.
The Type of Account selection bar opens at the bottom of the screen. Tap Credit Card.
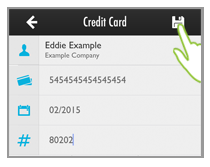
The Add Credit Card screen opens.
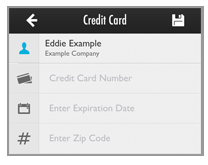
Tap the Credit Card Number field to
open the number pad and enter the card number. Enter the full card
number without any spaces or dashes. (16 digits for Visa, MasterCard
and Discover, 15 digits for American Express.)
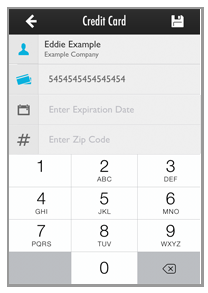
NOTE: Based card number entered, the
system will automatically assign the correct card type and you will
see that logo displayed to the left of the card number. (American
Express account numbers always start with 3, Visa account numbers
always start with 4, MasterCard account numbers always start with
5, and Discover account numbers always start with 6.)
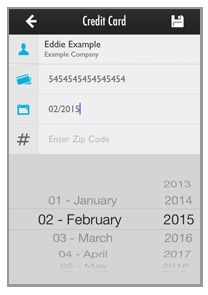
Tap the Enter Expiration Date field to open the date wheel and select the credit card Expiration month and year from the wheels. The date you select will be shown in the Expiration Date field using MM/YYYY format.
Tap the Enter Zip Code field to open the keypad, and enter the billing zip code for the credit card.
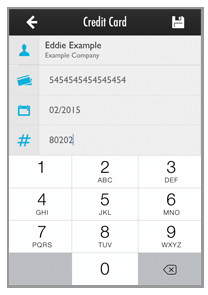
Tap the Save icon at the top-right of the screen.
NOTE: The Account Number and
Expiration Date entered are validated. If it is
not a valid number, or if the expiration date is in the past, you
will see an error and be returned to the Add
Credit Card screen. Correct
the error and save again.
You are returned to the Collect Payment screen with the payment account you just added active and displayed under the Customer field.
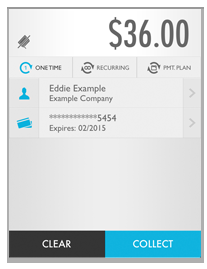
Continue with processing the payment or entering the schedule.
To hand enter a bank account as part of the payment collection or schedule entry process, follow the steps below.
Tap Collect Payment in the Quick Menu to open the Collect Payment screen.
Enter the Payment Amount.
Select the payment type. (This example uses One Time, which is the default.)
Tap Select
a Customer to choose a customer to charge, or enter a new one.
NOTE: See Adding Customers while Entering Payments and Schedules for instruction on adding a new customer
or Collect Payment
for instructions on selecting an existing customer.
Tap Select Payment Method... (or Select an Account or Swipe a Card..., if you have a swiper installed.)
If there are accounts saved with the
customer they will be displayed.
NOTE: The check marks in the green
circles denote the default credit card and default bank account.
You can change the default account from the web-based UI.
If no accounts are saved, that will be indicated as shown below:
Tap the + icon to the right of the Select Account header.

The Type of Account selection bar opens at the bottom of the screen. Tap ACH.

The Add ACH Account screen opens.
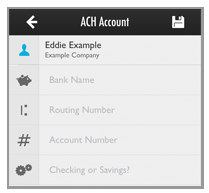
Tap the Bank field to open the keyboard and enter the name of the customer’s bank.
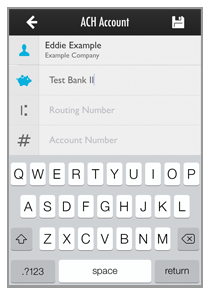
Tap the Routing Number field to open the keypad. Enter the 9-digit routing number for the customer’s account.
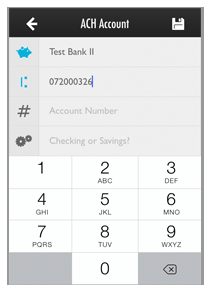
Tap the Account Number field to enter the bank account number.
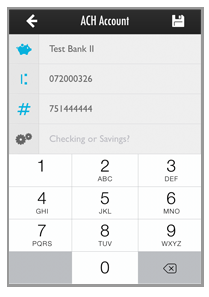
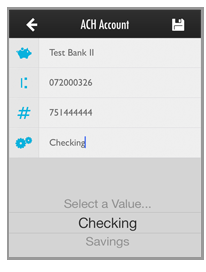
If the account is a checking account you do not need to make a selection in the Checking or Savings? field, it will always default to “Checking.” If you are entering a savings account, tap the field to open the selection wheel. and select “Savings.”
Tap the Save icon at the top-right of the
screen.
NOTE: The Routing Number entered is validated.
If it is not a valid number, you will see an error and be returned
to the Add
ACH Account screen. Correct the
entry and save again
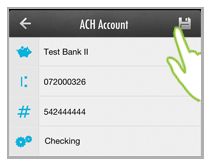
.
You are returned to the Collect Payment screen with the payment account you just added active and displayed under the Amount field.
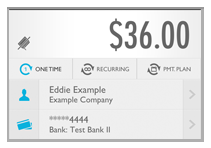
Continue with processing the payment or entering the schedule.
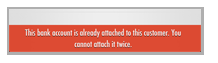
NOTE: The system will not save a duplicate Routing Number and Account Number combination, even if you enter different Bank Names. If you attempt to save a duplicate account, you will see an error like the one below. Tap anywhere on the screen to close it. You can now correct the entry and save again, or tap the Back icon at the top-left of the screen to return to the Select Account screen.