![]()
![]()
Customers can follow the steps below to login and make a payment using stored customer and account information on a payment form without logging in to Customer Portal.
Click a pay now link or payment button (sample below) to access the payment form.
The payment landing page appears, as shown below:
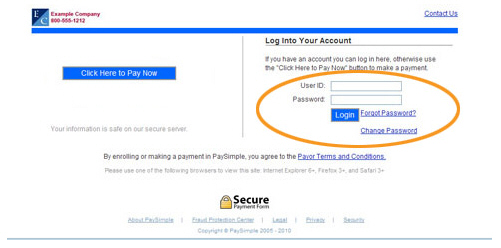
Enter
Password in the field.
NOTE: If customers forget their passwords
they can click the “Forgot Password?” link to have them reset
and emailed to the email address on file for the User ID. If they
are locked out, they can call you to have the password reset and
the account unlocked.
Click the “Login” button.
The payment form screen will appear with the customer’s saved information entered into the form.
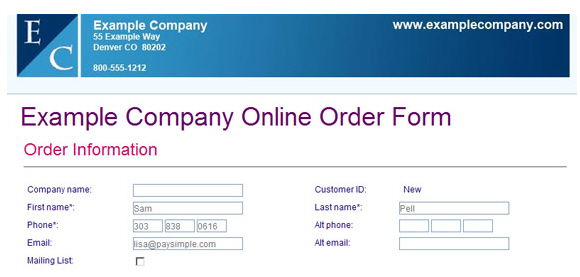
Complete any
blank fields, or make changes to existing fields as required.
NOTE: Any changes or additions will be
stored with the customer’s account and will be available the next
time the customer logs into a payment form or into Customer Portal.
The changes will also be reflected in the Customer Record you see
in your ReceivablesPro
account.
Complete the Payment Information section for the type of payment or schedule being made.

Review,
select or enter the Payment
amount.
NOTE: Customers will see a greyed
out fixed amount, a drop-down box from which to select an
amount, or a blank field in which they can enter any amount,
depending on how the payment form was configured. (See Add a Web Payment Page in Chapter 8 for instructions on how to configure
Web Payment Pages.)
Enter
an Invoice number
(if the field is visible.)
NOTE: If your customers enter
an ReceivablesPro system
invoice number in this field that is attached to their Customer
Record, the payment will mark the invoice as “Paid” if the
payment is for the full invoice amount, or “Paid (partial)”
if the payment is for less than the full amount. (Because
of the limitations of this functionality described in this note,
it is preferable to have your customers pay invoices online
via Customer Portal.)
NOTE: To prevent Web Payment Pages from being used for invoice
payments, you can hide the Invoice
number field. (See
Add a Web Payment Page in Chapter 8 for instructions.)
Recurring Bill Payment Schedule —See Recurring Bill Payment Schedule for instructions on how to enter this type of schedule on a web payment form.
Payment Plan Schedule—See Payment Plan Schedule for instructions on how to enter this type of schedule on a web payment form.
Credit Card—Select the “Credit Card” radio button. (This is the default selection.)
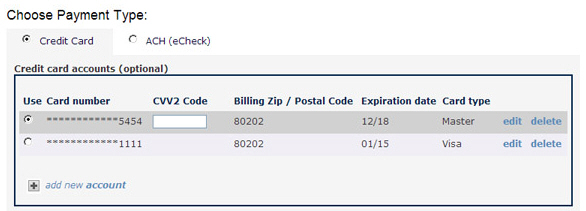
The table, as shown above, contains all of the credit card accounts the customer has saved in the system.
The
default credit card is selected automatically. To use a different
card, select its radio button, or click the “add new account”
link to save a new card to the account.
NOTE: The card expiration date
and billing zip can be edited by clicking the “edit” link
and entering a new expiration date or zip. Delete any card
in the list by clicking the “delete” link.
Enter the CVV2 Code for the card in the field that will appear in the CVV2 Code column for the selected card. (This is the four digit number on the front of American Express cards, or the three digit number on the back of Visa, MasterCard, and Discover cards. These numbers are collected for security reasons, and are never stored in the system.)
Echeck (ACH) transfer from a bank account—Select the “ACH (eCheck)” radio button.
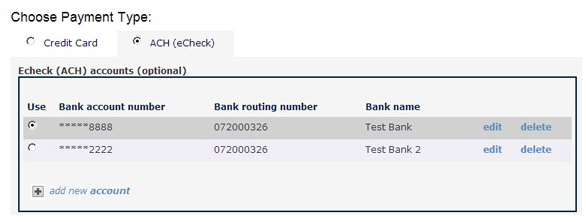
The table, as shown above, contains all the bank accounts the customer has saved in the system.
The
default bank account is selected automatically. To use a different
bank account, select its radio button, or click the “add new
account” link to save a new card to the account.
NOTE: Delete any account in the
list by clicking the “delete” link. Click the edit link to
set an account as the default or change and account type.
The customer’s Billing Address and Shipping Address (if included on the form) will contain the values stored for their account. Make any additions or changes to these fields as required.
Review the Terms and Conditions, and check the “I accept the terms and conditions” box.
Click the “Pay Now” button to submit the payment, or click the “Cancel” button to discard it.
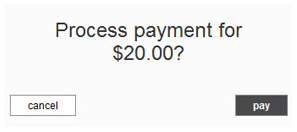
A pop-up box will appear asking to confirm the payment amount. Click “pay” to process the payment, or click “cancel” to return to the payment form and enter a different amount.|
Any errors will appear at the top of the page.
Make any required corrections and submit the payment again. When the payment
is successful a printable thank you screen will appear. It contains a
Confirmation number and a summary of the transaction or
schedule entered.
NOTE: If you configured Social Links to
appear on your payment receipts inviting your customers to connect with
you on Facebook, Twitter, or Yelp, they will appear at the top-right of
the confirmation screen. (See Social Links in Chapter 8 for
instructions on how to configure these links.)
Customers also receive an email receipt for the processed payment. If a recurring bill payment schedule or a payment plan schedule was entered, the schedule details will be shown on the confirmation screen and customers will receive an email confirming schedule authorization and summarizing the details of the schedule.
Additionally, when customers login to Customer Portal they will see the payment included in the table on the Payments tab.
