![]()
![]()
Every ReceivablesPro user must be assigned a role when the Record is created. (See Add Users above.) This role can be changed to any built-in or custom role by editing the UserRecord. (See Edit Users above for complete details on editing users.) Follow the instructions below to change the role assigned to any individual user.
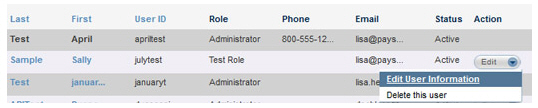
Locate the user for which you want to change roles in the Users table.
Click the Edit button, then click “Edit User Information” or click the user’s linked first or last name.
In the Account Access section, click the “manage roles” link in the Role field.
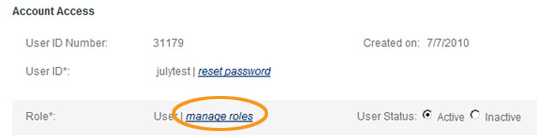
The Please Select Role screen opens, with the role currently assigned to the user selected.
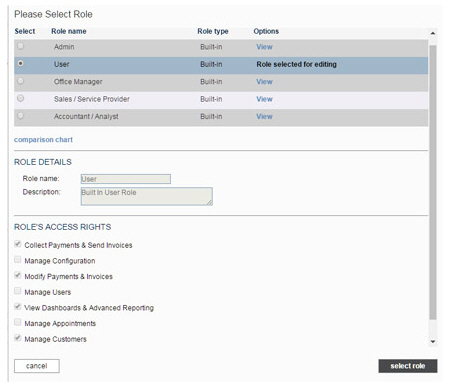
Choose the radio button in the Select column for the role you want to assign to the user.
NOTE: ROLE DETAILS and ROLE’S ACCESS RIGHTS for the selected role will appear under the Roles table. You are not able to edit roles from this screen. (See Edit Roles for instructions on how to edit roles.)
Click the “select role” button.
You return to the Users screen and the role you just selected will now appear in the Role field.
Click the “save changes” button at the bottom of the Users screen to save the role change.
NOTE: You must click the “save changes” button at the bottom of the Users screen to save the role change. Simply clicking the “select role” button on the Please Select Role screen WILL NOT save the change.
You return to the Users table, and the user’s new role will appear in the Role column of the table.

The next time the user logs into ReceivablesPro he will have the permissions associated with the new role.