![]()
![]()
Clicking the roles tab in the Settings section opens the Role Management screen. From this screen you can view full details of all built-in and custom roles defined in your ReceivablesPro system.
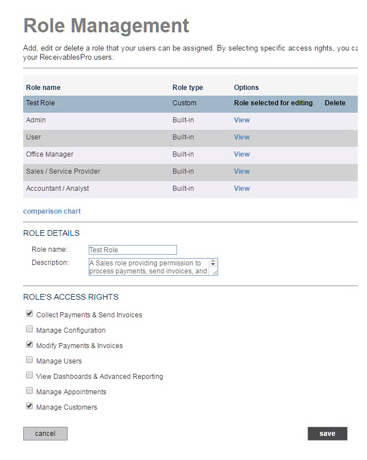
The table contains three columns:
Role name-- The name assigned to the role. This is the name that will be displayed in the User Management table, and in the Role field on individual User Records.
Role type-- ReceivablesPro roles are either “Built-in” or “Custom.”
Built-in roles are pre-configured and added to every ReceivablesPro account. They cannot be edited or deleted.
Custom roles are those that you create by selecting a set of access rights. These roles can be edited and deleted. (See Add Roles and Edit Roles below.)
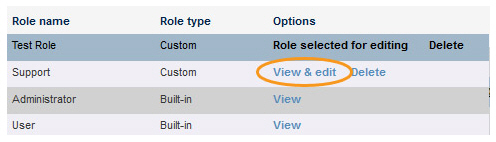
Options-- Provides
links for accessing view, edit, and delete functions for roles.
NOTE: For Built-in roles, only the view
link will be visible.
When the Role Management screen opens, one of the roles will be highlighted, and the Options column will read “Role selected for editing.” Under the table you will see the ROLE DETAILS and ROLE’S ACCESS RIGHTS for the selected role.
NOTE: Even though Built-in roles cannot be edited, you will still see “Role selected for editing” in the Options column when the role is selected for viewing. You’ll notice that the fields are all greyed-out, and that there is no “save” button on the screen when viewing a Built-in role. This indicates that the role is view-only.
To view a different role, click the “View” link (Built-in roles) or “View & edit” link (Custom roles) in the Options column for the role you want to view.
The ROLE DETAILS and ROLE’S ACCESS RIGHTS for that role will now be shown below the table, and the role will be highlighted in the table with “Role selected for editing” shown in the Options column in place of the link.