![]()
![]()
You can edit any custom ReceivablesPro role to change the Role name or Description, or add and remove access rights.
Follow the steps below to edit a custom role.
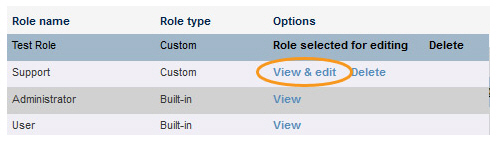
In the table on the Role
Management screen, click the “View & edit” link for the
role you want to edit.
NOTE: If the role you want to edit is
at the top of the table, it may already be selected.
The ROLE DETAILS and ROLE’S ACCESS RIGHTS for the selected role are visible below the table.
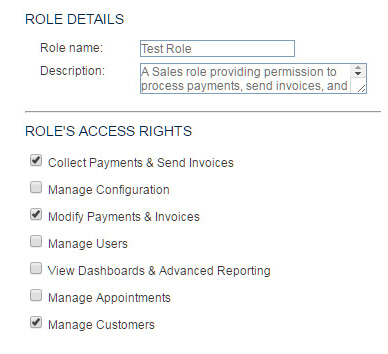
Make any required changes to the Role name, Description, or ROLE’S ACCESS RIGHTS.
To add an access right, click its checkbox. To remove an access right, un-check its checkbox. (See Role Components above for a complete description of all available access rights.)
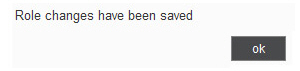
When
you’re done making changes, click the “save” button.
NOTE: If you want to discard the changes,
do nothing. Changes will not be saved until you click the “save” button.
A pop-up window will appear confirming that the new role has been saved. Click “ok” to close it and return to the Manage Roles screen.
You will now see the role you just created highlighted in the table, and the changes you made will be reflected in the ROLE DETAILS and ROLE’S ACCESS RIGHTS sections below the table.
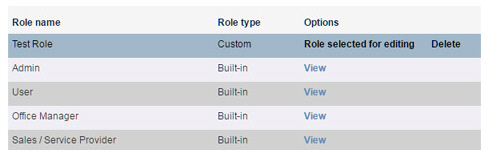
The next time a user assigned to the changed role logs in to the system he will have access based on the changed role.
