![]()
![]()
Watch this three minute video tutorial to see how to enter one-time invoices. Detailed instructions follow below.
Follow the steps below to create and send a one-time invoice.
Navigate to the send new invoice tab in the Invoices center by clicking the “Send Invoice” Quick Link in side navigation.
Select or enter a Customer to load. (See Loading and Entering Customers for New Invoices and Schedules.)
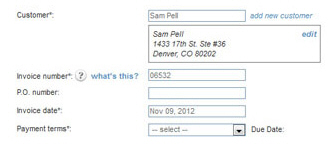
In the Invoice number field, leave the auto-generated invoice number, or enter your own invoice number.
If you have enabled auto-invoice numbering, leave this field as is to use the Next invoice number.
If you have enabled auto-invoice numbering, but want to override the auto-number, clear the Invoice number field and enter any alpha-numeric invoice number you choose.
If you have not enabled auto-invoice numbering the Invoice number field will be blank. You are required to enter an invoice number.
If your customer has a P.O. number, enter it in the P.O. number field. (Optional, maximum 50 characters.)
The
Invoice date field defaults
to the current date. Leave this default setting as is.
NOTE: See Scheduling
One-time Invoices for a Future Date for
instructions on how to enter a one-time invoice that will be sent
on a future date.
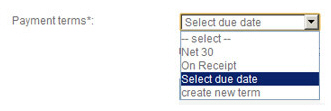
Select the Payment terms for this invoice. Do one of the following:
Select existing Payment terms by clicking the down arrow on the Payment terms drop-down box, and clicking on the terms you want to apply, as shown below:

The Due Date will be displayed to the right of the Payment terms drop-down box, based on the selection you made.
In the above example, the current date is November 9, 2012,
and with Payment terms of
Net 30, the Due Date is calculated
as December 9, 2012. (The calculation begins the day AFTER
the invoice is sent.)
Click
the “create new term” item in the Payment
terms drop-down box list.
NOTE: You can also create and
delete Payment Terms from the Settings-->
Configuration--> Payment Terms & Taxes screen. You cannot delete Payment
Terms from the drop-down box on the send new invoice screen.
(See Payment Terms in Chapter 8 for instructions.)
The Create a new payment term screen opens, as shown below:
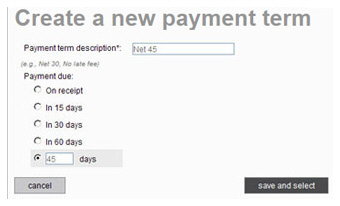
Enter a description of the payment term in the Payment term description field. This field will only appear in the Payment term drop-down list. Your customer will not see this description.
Select
one of the pre-programmed terms, or enter your own by selecting
the last radio button, and entering a number of days for the
term.
For example, in the above screen capture we are creating a
payment term of Net 45 days, so the last “Payment due” radio
button is selected, and “45” is entered in the days
field.
Click the “save and select” button to create the new payment term and use it for the invoice you are creating.
The Due Date will be displayed to the right of the Payment terms drop-down box, based on the selection you made.
Click the “Select due date” item in the Payment terms drop-down box list.
A new field containing the current date will appear next to the Payment terms drop-down box. Click the field to open a calendar from which you can select the due date. (Or just type the date in the field.)
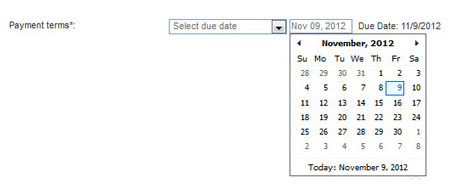
The
field to the right of the Payment
terms drop-down box will display the date you
selected, and the Due Date
field will also reflect that date, as shown below.
NOTE: You can change this date
by clicking in the field and selecting or entering another
date, and the Due
Date field will update
accordingly.

Configure Early
Payment Incentive.
NOTE: For detailed information on Early
Payment Incentives see About Invoice Incentives and Penalties.

The “No” radio button is selected by default. Leave this as is if you do not want to offer a discount to customers who pay invoices early.
To offer an incentive deduction, select the “Yes” radio button to open the incentive configuration fields.

Select the type of deduction you would like to offer from the drop-down box. “Percent” is the default. You can change this to “Flat Amount” by selecting that option from the box.
Enter the exact discount you would like to offer in the Apply a field.
For a Percentage enter the deduction you want to provide off the invoice total. For example to provide a two and a half percent deduction, enter 2.5 (do not enter .025).
For
a Flat Amount enter a dollar value (without the $-- i.e.
enter 5.00 not $5.00).
NOTE: The incentive deduction
is entered as a positive number when it is configured,
but appears as a negative number (discount) on the actual
invoice.
In
the days before field,
enter the number of days in advance the invoice must be paid
in order to earn the incentive deduction.
In the example below we are offering a 10% discount if the
invoice is paid more than 15 days prior to the due date.

Configure
Late Payment Fee.
NOTE: For detailed information on Late
Payment Penalty Fees see About Invoice Incentives and Penalties.

The “No” radio button is selected by default. Leave this as is if you do not want charge an additional fee for invoices that remain unpaid after the due date.
To charge a penalty fee, select the “Yes” radio button to open the penalty fee configuration fields.

Select the type of fee you would like to charge from the drop-down box. “Percent” is the default. You can change this to “Flat Amount” by selecting that option from the box.
Enter the exact penalty you want to charge in the Apply a field.
For a Percentage enter the penalty fee you want to charge over the invoice total. For example to charge a two and a half percent penalty fee, enter 2.5 (do not enter .025).
For a Flat Amount enter a dollar value (without the $-- i.e. enter 5.00 not $5.00).
In
the days after field,
enter the number of days after the invoice Due
Date to begin charging the late fee. (For example,
if the invoice is Due on May 1, and you enter 10 days, the
late fee will appear on May 11.)
In the example below we are charging a 10% late fee if the
invoice remains unpaid 15 or more days after the due date.

As this invoice is not part of a schedule, leave the invoice type drop-down box set to “One-time invoice.”
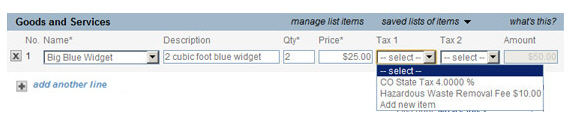
Enter the Line Items that comprise the invoice in the Goods and Services section, shown below:

Click the arrow on the Select Item drop-down box, as shown below, and select one of the items in the list, or select the “add new item” link to add a new item. (See Adding New Items, for how to add new items.)

The Description and
Price fields for that
item will be auto-populated.
NOTE: You can change the Description and/or Price for
this individual invoice without changing the saved values
for the item.
The Qty field
will automatically be set to “1.” Change this value to the
appropriate number for the invoice, if required.
NOTE: Your can enter decimal
values to 2 places in this field, or enter whole numbers.
For example, enter “10” to invoice for ten items, or enter
“1.25” to invoice for an hour and fifteen minutes of consulting
time.
In
the Tax 1 drop-down
box, select a Tax that will be applied to this Line Item,
as shown below. (See Invoice Terms & Taxes in Chapter 8 for
how to enter and edit tax rates.) If you do not make a selection,
then no tax will be applied to this Line Item.
NOTE: The tax amount will be
calculated based on the Amount less any discount.
For example, if the tax rate is 10%, the Discount is 10%, and
the Amount is $100 the taxable amount for the line item will
be $9.00-- (100 - 10) * 0.10 = 9.
|
You can also enter a new tax rate by selecting “add new item” from the Tax 1 (or Tax 2) drop-down box. This will open a pop-up window, shown below, from which you can enter the Tax Name and the Tax Rate. 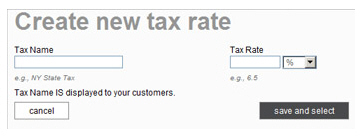
|
In
the Tax 2 drop-down
box, select a second Tax that will be applied to the Line
Item, if applicable.
NOTE: Tax
2 will be calculated
based on the total cost of the items only, not on the cost
of the items plus Tax
1.
The Amount field for the Line Item will now reflect the total amount for the items alone, not including the taxes. i.e. Qty x Price = Amount.
Enter additional Line Items by clicking the “add another line” link and repeating steps i-vi.
Delete Line Items by clicking the “x” at the far left side of the Line Item.
Enter a saved list of items. A “saved list of items” is a group of Line Items and associated taxes that can be loaded all at once into a blank invoice.
|
If
you have individual Line Items entered into an invoice,
and you then load a “saved list of items,” the individual
Line Items will be overwritten by the saved list. |
Click the “saved lists of items” link in the Goods and Services navigation bar.
A list of your saved Line Items will appear as shown below. (See Saving and Retrieving Lists of Items for how to save item lists.)
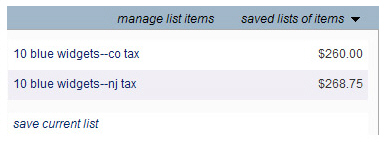
Click on the list you want to load into the invoice.
Your invoice will now be populated with the saved Line Items programmed for the list, including quantities and taxes and Amount, as shown below:

In the DISCOUNT field, enter the percentage discount you want to provide off the invoice total. You can enter any number between 0.01 and 99.99. For example to provide a two and a half percent discount, enter 2.5 (do not enter .025). The default Discount is 0%. If you enter a Discount, an additional line will be added to the invoice for the discount, as shown below.
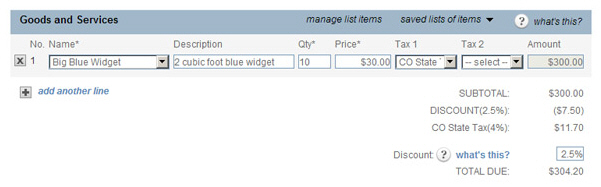
The SUBTOTAL, DISCOUNT and Taxes fields, as shown above, will be calculated based on the Line Items.
SUBTOTAL = The sum of all Goods and Services, excluding Tax and Discounts.
The DISCOUNT applied to the invoice will be on its own line and shown as a negative dollar value. The DISCOUNT percentage is indicated in parenthesis.
Each Tax applied will have its own line on the invoice. The Tax name will be listed first, the tax percentage or flat amount will be next to it in parenthesis, and the total tax charged will be displayed.
The TOTAL DUE field is calculated based on the total of all Line Items and taxes less any discounts. (SUBTOTAL + TAXES - DISCOUNT)
The Note for customer field, shown below, is a text area that allows you to add a note to your customer in the invoice. There is a 2000 character limit for this field.
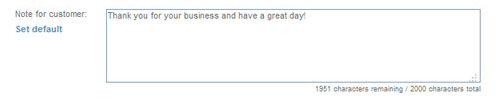
If you entered a system Note for customer in the Default invoice note visible to customer field on the Settings --> Configuration--> Preferences screen, that text will appear in the invoice Note for customer field. You can make changes to this field for any individual invoice without changing the system-wide setting. (See Invoice Preferences in Chapter 8.)
You can click the “Set default” link
to set the default system Note
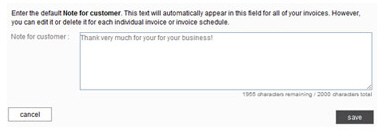
for customer. When you click the link, a pop-up window
will open as shown below, and the current system-wide note text
will appear in the field.
You can enter or change the text, and when you click the “save”
button the new default will be placed in the current open invoice.
It will also be saved in the Default
invoice note visible to customer field on the Settings
--> Configuration--> Preferences screen, and
will be used as the default on all future invoices.
To return to the invoice without setting the default Note
for customer, click the “cancel” button.
NOTE: The system will not pick up
the text entered in the Note
for customer field in
the invoice you are working on at the time you click the “Set
default” link. If you want to use that text as the default, copy
it prior to clicking the “Set default” link then paste it in the
field.
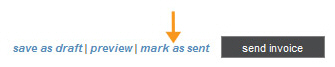
Now that invoice configuration is complete, you can take one of the following actions, accessed from the bottom right buttons and links on the send new invoice page, as shown below:
Click
the “send invoice” button.
NOTE: If there are any errors
in the invoice, the system will prompt you to correct them
at this point. Make any corrections, and click the “send invoice”
button again.
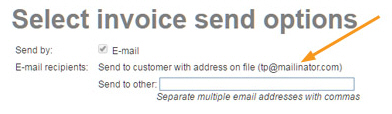
The Select invoice send options window opens.
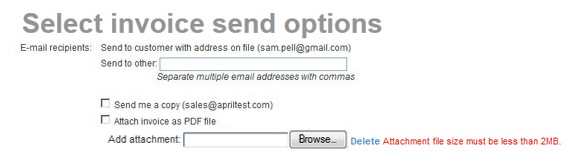
The top portion of the screen contains send configuration settings.
The email is always sent to your customer’s default email address, which is displayed.
You can enter any email address in the Send to other field, or enter multiple email addresses separated by commas. (200 characters maximum) Each time the invoice is sent, it will also go to these addresses.
Checking
the Send me a copy
box will CC the email to your company’s default
email address (shown in parenthesis).
NOTE: If you have this box
checked by default for all invoices, you can configure
the system to do this. Go to the Settings--> Configuration-->Email
preferences and templates screen,
and in the INVOICES section select the “Yes,
cc me on all invoices” radio button. You can also change
the address to which this email is sent from that screen.
(See Email Preferences and Templates in
Chapter 8.)
Checking the Attach invoice as a PDF file box will instruct the system to attach a .pdf version of the invoice to the email sent to your customer. This will enable the customer to view and save the invoice directly from the email, even if they are not connected to the Internet.
You can attach any file to the
invoice as long as it is under 2MB. (Potentially dangerous
file types such as .exe files will be rejected.) Click
the Browse button
next to the Add attachment
field, then select the file you want to attach
from your computer. The file path will be displayed in
the field. (Click the “Delete” link to clear the Add attachment field
and remove the file from the invoice.)
NOTE: The file will only
be attached the first time the invoice is sent-- it is
not saved by the system and will not be automatically
resent if the invoice is resent (either manually or via
the overdue invoice reminder function.) However, you can
attach the file again each time you email the invoice
to your customer.
The
bottom portion of the screen contains a preview of the invoice
Subject and Message, and is view only.
Changes can’t be made from this screen. It displays the text
message that will be sent with the invoice. The email is always
sent to your customer’s default email address, which is shown.
NOTE: When your customer receives
the invoice email it will contain a condensed version of the
invoice underneath this message and a “PAY INVOICE NOW” button
that your customer can click to log-into your Customer Portal and
pay the invoice online.

NOTE: If you would like to change
the subject and/or text portion of the new invoice email template
(the condensed version of the invoice is not editable), it
can be done from the
Settings-->
Configuration--> Email Preferences and Templates screen. Scroll down to the INVOICES section, and click the “Edit”
link for the “New invoice email” template. (See Email Preferences and Templates in Chapter
8 for detailed instructions.)
Click the “send invoice” button to activate and send the invoice. Or, click “Cancel” to return to the send new invoice screen.

If there is no email address attached to the Customer Record, a pop-up window will ask you to provide one, as shown below.
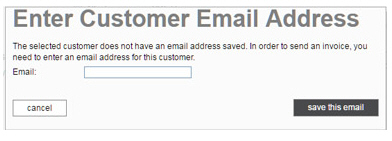
• Enter the customer’s email in the box.
• Click the “save this email” button.
• You are returned to the Select invoice send options screen with the email you just added shown.
• Click the “send invoice” button again.
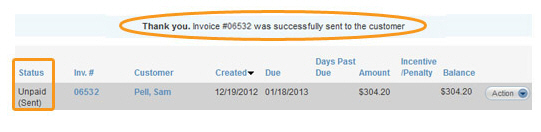
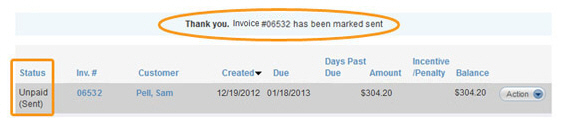
The system will then display the manage invoices screen, with a success message at the top, and the invoice you just created at the top of the Invoices table with a Status of “Unpaid (Sent)” as shown below.
Click
the “mark as sent” link to indicate that your customer has
received the invoice, whether or not the system has actually
emailed it.
NOTE: This is a good option to
use if you print invoices and mail or otherwise deliver them
to your customers outside of the ReceivablesPro
system.
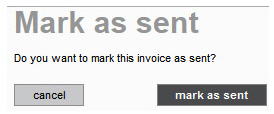
A pop-up window will appear asking you to confirm that you want to save the invoice and mark it as “sent.” Click the “mark as sent” button to mark the invoice as sent, or the “cancel” button to return to the invoice without taking any action.
If there are any errors in the invoice, the system will prompt you to correct them at this point. Make any corrections, and click the “mark as sent” link again.
The system will then display the manage invoices screen, with a success message at the top, and the invoice you just created at the top of the Invoices table with a Status of “Unpaid (Sent)” as shown below.
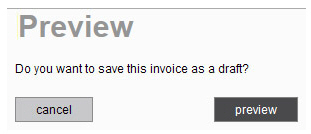
Click the “preview” link to view the invoice your customer will receive.

A pop-up window will appear telling you that the invoice will be saved as a “Draft” (meaning it will not be emailed to your customer and will have a Status of “Draft.”) in order to create the preview. Click the “preview” button.
If there are any errors in the invoice, the system will prompt you to correct them at this point. Make any corrections, and click the “preview” link again.
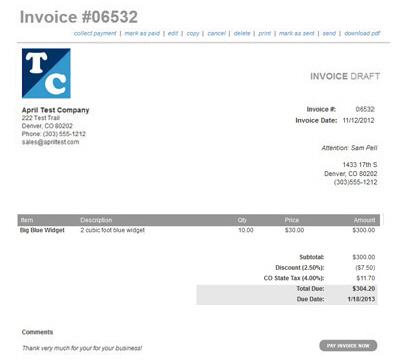
The
preview will appear, as shown below.
NOTE: You can use the links at
the top of the screen to perform the indicated actions. For
definitions of all these actions, see Managing Individual Invoices.
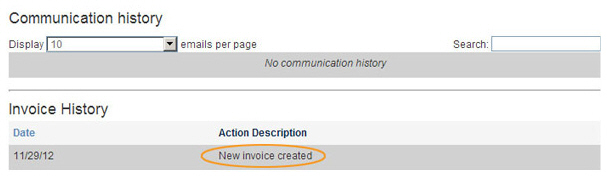
The history section of the invoice will indicate that the invoice has been created, but not sent, as shown below.
You can now take one of the following actions:
Click the “edit” link at the top of the screen to return to the invoice and make changes.
Click the “send” link at the top of the screen to save the invoice and send it to your customer. After you click this link, you will need to complete the Select invoice send options screen and click the “email invoice” button. When the invoice is successfully saved and sent, you will see a success message in the manage invoices screen, as shown above.
Leave the page without taking any further action. Doing this will leave the invoice in “Draft” Status.
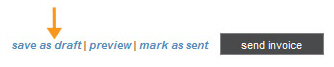
Click the “save as draft” link.
A pop-up window will appear asking if you want to save the invoice as a Draft. Click “save.”
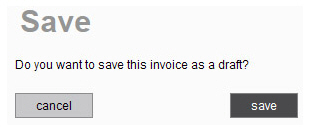
If there are any errors in the invoice, the system will prompt you to correct them at this point. Make any corrections, and click the “save” button again.
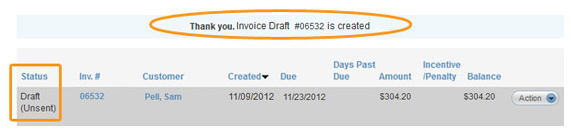
The invoice will be
saved as a Draft, and the system will then display the manage invoices screen,
with a success message at the top, and the invoice you just
created at the top of the Invoices table
with a Status of “Draft (Unsent)” as shown below.
NOTE: The “(Unsent)” mark means
the invoice has not been sent, or marked as sent.
You can edit and send this invoice at a later date. (See Editing and Deleting Draft Invoices.)
Cancel the Invoice, by clicking the “cancel” button at the bottom left of the page.
