![]()
![]()
With the ReceivablesPro Mobile App
you can add a new customer and enter a new payment in one simple process.
Both the bank account information (for a checking or savings account)
and basic customer information are entered on the same screen and then
used to process the payment.
NOTE: Per NACHA ACH processing rules, all
ACH transactions entered via the Mobile App will be designated WEB. (See
Authorizing Echeck (ACH) Transactions in Appendix
A for details on ACH transaction
types.)
|
Every
time you manually enter a bank account using the method described
in this section a new Customer Record will be created. |
The manual payment account entry screen provides fields for collecting customer first name, last name, email address and phone number. No other customer information, such as billing or shipping address, can be entered via the Android Mobile App. However, after the transaction has been processed you can add additional information by editing the Customer Record in the web-based application. (See Editing Customer Information in Chapter 6 for instructions.)
Follow the steps below to manually enter checking or savings bank account information and process a one-time payment:
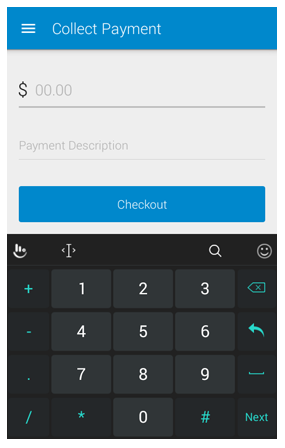
The Android App opens to a blank Collect Payment screen, with the number pad open, by default.
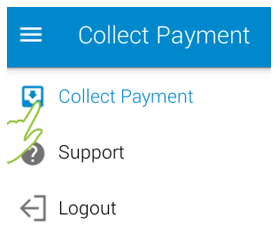
If you are on a different screen, you can tap Collect
Payment in the Menu to
open the Collect Payment screen.
Enter the transaction Amount Due in the first field, after the “$”
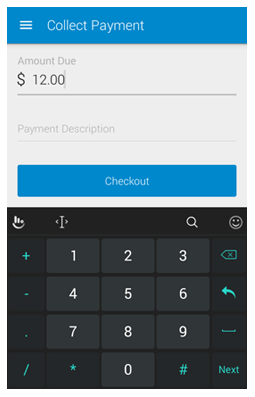
Optionally,
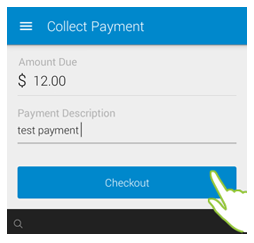
enter a Payment Description.
NOTE: This will be placed in the Payment Description field for the transaction, and may be
printed on receipts and other transaction reports.

Tap Checkout.
The Payment
Options screen opens, with the transaction amount indicated
in big green numbers at the top of the screen.
NOTE: If the amount is incorrect, use
your device “back” function to return to the previous screen and correct
it.
Tap eCheck or ACH
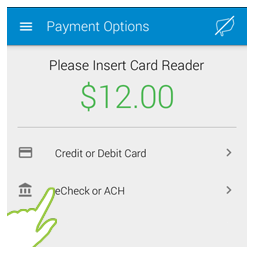
.
The eCheck or ACH screen is displayed with the keyboard open for entering the Bank Name.
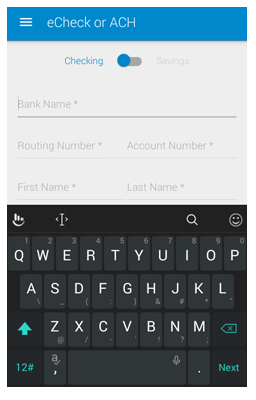
The screen defaults to a Checking account, swipe the toggle the right to select a Savings account.

Enter the Bank Name.
Enter the bank account 9-digit Routing Number.
Enter the bank Account Number.
Enter the customer First Name and Last Name.
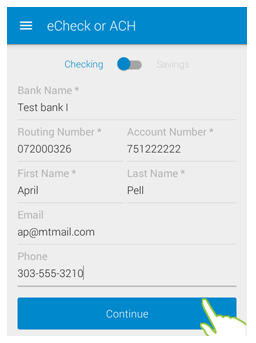
Enter
the customer’s Email Address
(optional).
NOTE: The email address you enter
here will be used to automatically send a receipt for the payment
you are processing.
Enter the customer’s Phone number (optional).
Review your entries, and when everything looks correct, tap Continue.
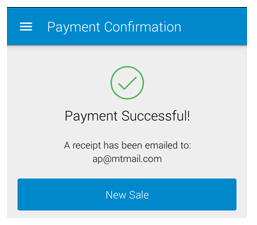
The Confirm Payment screen opens with the payment Amount displayed on top, and the information you just entered displayed below it as follows:
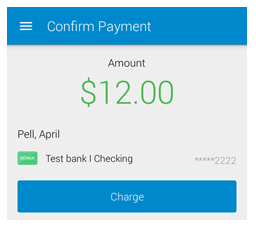
The customer’s full name in the format of Last Name, First name.
The eCheck icon.
The bank name and account type.
A redacted version of the bank account number (the last four digits are displayed).
Once you’ve confirmed all is correct, tap Charge.
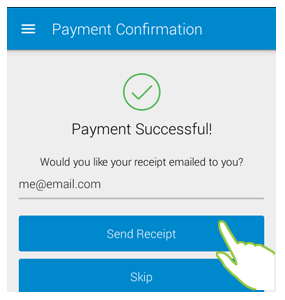
The Payment Confirmation screen displays the transaction result.
For a successful payment, if you entered an email address when entering the bank account information (Step 7 above), a receipt is automatically sent to the email address entered. This is indicated on the confirmation screen as shown.
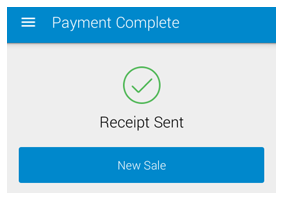
For
a successful payment where you did not enter an email address,
you are provided the option of entering one and sending a receipt
or skipping this step.
NOTE: To skip the receipt, tap Skip and
you will go to the Payment
Complete screen with
a “Done” message. Tap New
Sale to return to a
blank Collect
Payment screen. (See steps
iii and iv below)
To send the receipt:
Enter an Email Address in the field provided.

Tap Send Receipt.
The Payment Complete screen opens with a “Receipt Sent” message displayed.
Tap New Sale to close the message and return to a blank Collect Payment screen.
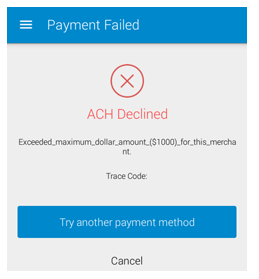
For a failed payment, the Payment Failed screen will be displayed along with information about why the payment failed. Tap Try Another Payment Method to return to the Payment Options screen (Step 6), where you can swipe a credit card or key-enter credit/debit card or different bank account information. Or tap Cancel to abandon the transaction and return to a blank Collect Payment screen.
Once you have dismissed the Failed Payment or Payment Confirmation screen you will not be able to access this information again from the Android Mobile App. (You may be able to use the device “back” function to get there if you are still in the same session-- though if you do this, be careful not to inadvertently process duplicate transactions.) However, all transactions processed in the Android Mobile App are immediately visible in the web- based interface. To view full transaction details, go to the Manage Payments screen. (See Viewing Transaction Details in Chapter 4 for detailed instructions.)
Next Section: Processing Payments for Existing Customers >
