![]()
![]()
When you click the users tab the Users dashboard table appears, as shown below:
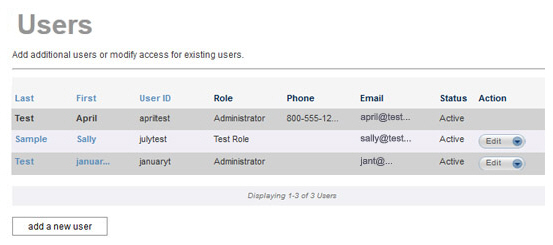
The table lists all of the users in your account, with 10 rows to a page. If you have more than 10 Users, there will be linked page numbers at the bottom of the table. Click the linked numbers at the bottom of the table to navigate through the list.
The Users table contains the following columns:
Last-- The User’s last name. You can sort the table alphabetically by last name. Click the linked column header once to sort from A-to-Z, click again to sort from Z-to-A. You can click the linked last name of any user to open that User Record in edit mode. (See Edit Users below for more information.)
First--The User’s first name. You can sort the table alphabetically by first name. Click the linked column header once to sort from A-to-Z, click again to sort from Z-to-A. You can click the linked first name of any user to open that User Record in edit mode. (See Edit Users below for more information.)
User ID-- The User ID assigned to the User. (This is the User ID entered on the login screen.) You can sort the table alphabetically by User ID. Click the linked column header once to sort from A-to-Z, click again to sort from Z-to-A.
Role-- The role assigned to the User. (See Roles below.) This column is not sortable.
Phone-- The User’s phone number. (Typically you will see only the first portion of the phone number displayed, as shown in the above screen capture. Place your mouse over it to see the complete phone number.) This column is not sortable.
Email-- The email address assigned to the User. This is the email address to which all password reset emails will be sent. (Typically you will see only the first portion of the email address displayed, as shown in the above screen capture. Place your mouse over it to see the complete email address.) This column is not sortable.
Status-- Indicates whether the User is “Active” or “Inactive.” Inactive users cannot login to ReceivablesPro. This column is not sortable.
Action-- This column contains the Edit menu. Click the Edit button to open the menu, then click on the link for the function you want to access. From this menu you can access edit and delete functions.