![]()
![]()
You can remove Social
Links from your payment confirmation screens at any time. To do this,
simply delete the link information in each link field on the Social
Links screen.
NOTE: You can remove any or all of the links.
Follow the steps below:
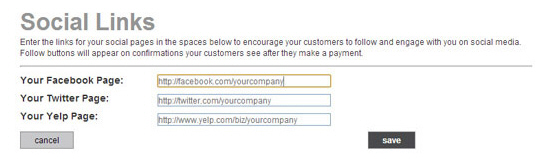
Open the Social Links screen. (From the Settings--> Configuration screen, click the “Social Links” link at the very bottom of the page.)
Delete the content you entered in the field for the link you want to remove. For example, using the screen capture below, you would delete “http://facebook.com/yourcompany” if you wanted to remove the Facebook link.
Click the “save”
button.
NOTE: You must click the “Save” button
after deleting the social link information from the field to prevent
the link from appearing on future payment confirmation pages.
You are returned
to the Configuration tab
with the new settings saved. Payment confirmation screens will no
longer contain the removed link (or links).
NOTE: If at least one social link remains
configured, the “Connect with us” header will remain on the confirmation
screen with the remaining icon link (or links).
To confirm that Social Links have been deleted, you
can send yourself an invoice and make an online payment or make a payment
via one of your Web Payment Pages. (You can void the payments and cancel
the invoices once you’re done previewing. See Voiding Transactions in Chapter 4 and
Cancelling Unpaid Invoices in Chapter 5.)
NOTE: You can add Social Links back in at any time by entering values in the appropriate link field. (See Configuring Social Links.)