![]()
![]()
Any transaction that has not yet been submitted for processing can be voided. To prevent errors, ReceivablesPro will only provide access to the Void function prior to submission. Watch this one minute tutorial video to see how it’s done. Detailed instructions follow below.
The Transaction Details page contains a Can Void Until field which will tell you when void functionality will be terminated for a particular transaction. (See Viewing Transaction Details above.) The date in this field is the last date upon which the Void function will be available—This is usually the same day that you entered the payment or credit. But in some cases such as weekends or holidays, it may be several days in the future.
The Void function can be accessed in the following ways:
By clicking the “void” button at the bottom of any Transaction Details page, as shown below:

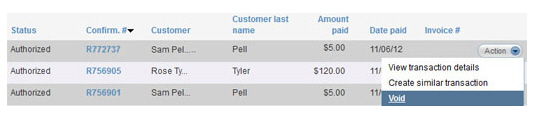
By clicking the Action button for the transaction you want to void, and then clicking the “Void” link, as shown below:
After you click the “Void” link or button:
A pop-up window will appear asking you to confirm the void.
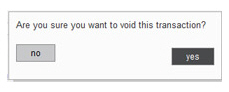
Click “yes” to proceed or “no” to leave the payment as is.
If you click “yes” you will be returned to the manage payments screen.

The
status of the payment will change from “Authorized” (CC) or “Posted”
(ACH) or “Refund (Posted)” to “Voided.”
NOTE: For voided refunds, when the transaction
changes from “Refund (Posted)” to “Voided” on the refund transaction,
the status of the original transaction changes from “Refunded” to
“Settled.”
Your
customer will receive an email confirming the void.
NOTE: The email will always be sent to
the Email address defined in the customer record, regardless of any
special email settings attached to the payment.
Once a transaction is voided you cannot cancel the void. If you decide that you really do want to process the transaction, you’ll need to enter it again as a new payment or credit.