![]()
![]()
You can add custom fields to the Customer module and to the Payment module of ReceivablesPro.
The custom fields screen is accessed by clicking the “custom fields” link in the ADDITIONAL OPTIONS section of the Settings--> Configuration screen.
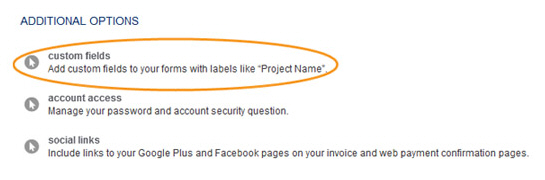
When you click this link the main Custom Fields screen opens, as shown below:
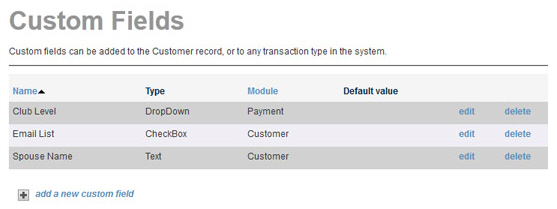
If you have custom fields configured, they will be listed in the Custom Fields table. (If no fields are defined, you will not see the table.) The custom fields are listed in the table in alphabetical order by Name. The table contains the following columns:
Name-- The Field name for your custom field. This is the text that identifies the field on your ReceivablesPro customer and payment screens, and in your web payment pages. Click the linked column header to sort by Field name. The default sort is A-to-Z. Click to sort from Z-to-A.
Type-- Indicates the type of custom
field. ReceivablesPro supports
4 custom field types: Text, Text Area, DropDown and CheckBox. The
table is not sortable by this field.
NOTE: Before adding a custom field, you
should determine the type of field you need and its characteristics.
For example, if you want to capture the shirt color your customer
wants, you could add a drop-down box listing all of the colors from
which to choose. If you want to record a yes/no answer, such as whether
to include the customer on your mailing list, a checkbox would be
more appropriate.
Module-- Indicates the Field location—Whether the field is attached to the Customer module or the Payment module. This column can be sorted to group fields by Module. Click once to show Customer fields first (they will be listed in alphabetical order within the Module field sort). Click again to show all the Payment fields first.
Default value-- For text fields
and text areas, you can define a default text string for use with
the field. If you have done this, you’ll see that text (or the first
portion of it) displayed in this column. You cannot define a Default value for CheckBox or DropDown
fields.
NOTE: The default value for DropDown
fields is “Select,” which is added automatically by the system.
NOTE: When you set a Default
value for a custom field,
all Customers or Payments (depending on the module to which the field
is attached) created from that point forward will be assigned the
default field value. The value will not be assigned to any Customer
or Payment created prior to the field’s creation.
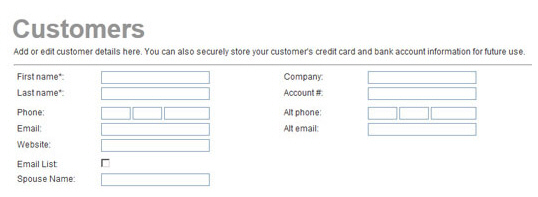
Custom fields attached to the Customer module appear at the bottom of the left column in the top section of the Customers screen. (In the screen capture below, “Email Newsletter” and “Spouse Name” are custom fields.)
Custom fields attached to the Payment module will appear at the bottom of the right hand column in the Enter payment details portion of the collect new payment screen. (In the screen capture below, “Club Level” is a custom field.)
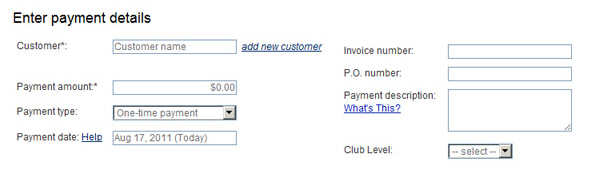
NOTE: The custom fields are only supported
for one-time payments. If you select the Payment
type as “Recurring billing”
or “Payment plan” the fields will be hidden.
The following sections provide detailed instructions on adding, editing and deleting custom fields. You can click on the Next links, located at the bottom of each screen, to read through the entire section. Or click one of the links below to jump to a particular area of interest.
Next Sections
