![]()
![]()
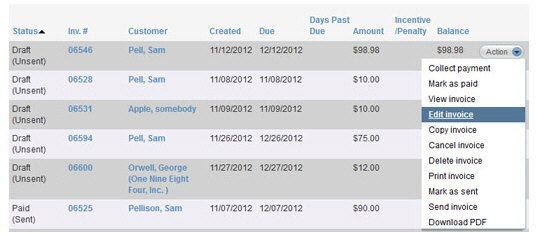
Locate the invoice in the Invoices table, and select “Edit invoice” under the Action button menu, as shown:
The saved draft
of the invoice will open. You can make changes to any sections of
the invoice. (See
Entering One-time Invoices above
for descriptions of all sections of an invoice.)
NOTE: Be sure that you update the Invoice date field
to the current date if you want to send the invoice immediately.
When you are done making changes, you can take one of the following actions, accessed via the bottom buttons and links shown below:
Click
the “send invoice” button.
NOTE: If there are any errors
in the invoice, the system will prompt you to correct them
at this point. Make any corrections, and click the “send invoice”
button again.
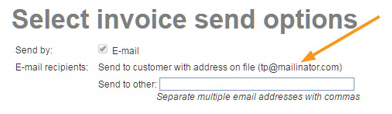
The Select invoice send options window opens.
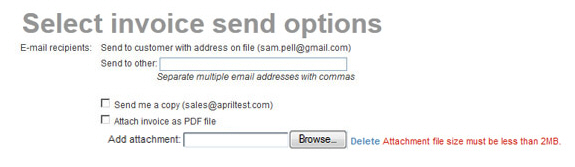
The top portion of the screen contains send configuration settings.
The email is always sent to your customer’s default email address, which is displayed.
You can enter any email address in the Send to other field, or enter multiple email addresses separated by commas. (200 characters maximum) Each time the invoice is sent, it will also go to these addresses.
Checking
the Send me a copy
box will CC the email to your company’s default
email address (shown in parenthesis).
NOTE: If you have this box
checked by default for all invoices, you can configure
the system to do this. Go to the Settings--> Configuration-->Email
preferences and templates screen,
and in the INVOICES section select the “Yes,
cc me on all invoices” radio button. You can also change
the address to which this email is sent from that screen.
(See Email Preferences and Templates in
Chapter 8.)
Checking the Attach invoice as a PDF file box will instruct the system to attach a .pdf version of the invoice to the email sent to your customer. This will enable the customer to view and save the invoice directly from the email, even if they are not connected to the Internet.
You can attach any file to
the invoice as long as it is under 2MB. (Potentially dangerous
file types such as .exe files will be rejected.) Click
the Browse button
next to the Add attachment
field, then select the file you want to attach
from your computer. The file path will be displayed in
the field. (Click the “Delete” link to clear the Add attachment field
and remove the file from the invoice.)
NOTE: The file will only
be attached the first time the invoice is sent—it is not
saved by the system and will not be automatically resent
if the invoice is resent (either manually or via the overdue
invoice reminder function.) However, you can attach the
file again each time you email the invoice to your customer.
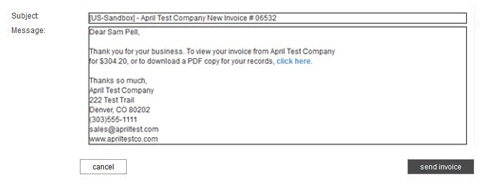
The
bottom portion of the screen contains a preview of the invoice
Subject and Message, and is view only.
Changes can’t be made from this screen. It displays the text
message that will be sent with the invoice. The email is always
sent to your customer’s default email address, which is displayed.
NOTE: When your customer receives
the invoice it will contain a condensed version of the invoice
underneath this message and a “PAY INVOICE NOW” button that
your customer can click to log-into your Customer Portal
and pay the invoice online.
NOTE: If you would like to change the subject and/or text portion
of the new invoice template (the condensed version of the
invoice is not editable), it can be done from the Settings -->
Configuration--> Email Preferences and Templates screen. Scroll down to the INVOICES section, and click the “Edit”
link for the “New invoice” template. (See Email Preferences and Templates in
Chapter 8 for detailed
instructions.)
Click the “send invoice” button to activate and send the invoice. Or, click “Cancel” to return to the send new invoice screen.
If there is no email address attached to the Customer Record, a pop-up window will ask you to provide one, as shown below.
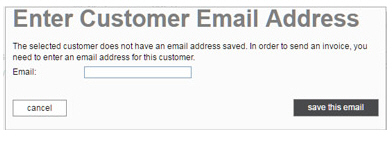
• Enter the customer’s email in the box.
• Click the “save this email” button.
• You are returned to the Select invoice send options screen with the email you just added shown.
• Click the “send invoice” button again.
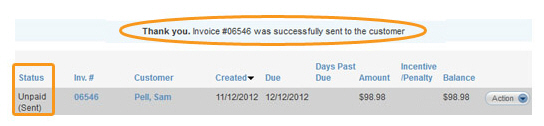
The system will then display the manage invoices screen, with a success message at the top, and the invoice you just created at the top of the Invoices table with a Status of “Unpaid (Sent)” as shown below.
Click
the “mark as sent” link to indicate that your customer has
received the invoice, whether or not the system has actually
emailed it.
NOTE: This is a good option to
use if you print invoices and mail or otherwise deliver them
to your customers outside of ReceivablesPro.
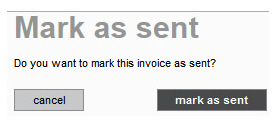
A pop-up window will appear asking you to confirm that you want to save the invoice and mark it as “sent.” Click the “mark as sent” button to mark the invoice as sent, or the “cancel” button to return to the invoice without taking any action.
If there are any errors in the invoice, the system will prompt you to correct them at this point. Make any corrections, and click the “mark as sent” link again.
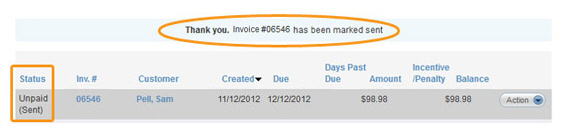
The system will then display the manage invoices screen, with a success message at the top, and the invoice you just created at the top of the Invoices table with a Status of “Unpaid (Sent)” as shown below.
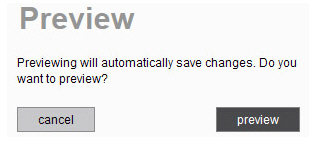
Click the “preview” link to view the invoice your customer will receive.
A pop-up window will appear telling you that any changes you made to the invoice will be saved in order to create the preview. Click the “preview” button to proceed with the preview.
If there are any errors in the invoice, the system will prompt you to correct them at this point. Make any corrections, and click the “preview” link again.
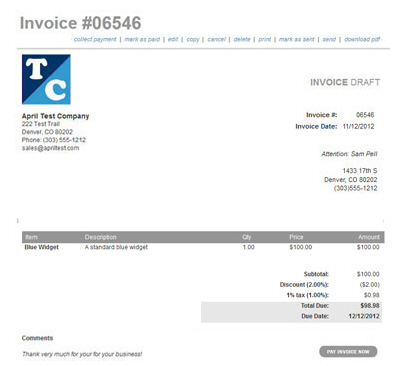
The
preview will appear, as shown below.
NOTE: You can use the links at
the top of the screen to perform the indicated actions. For
definitions of all these actions, see Managing Individual Invoices.
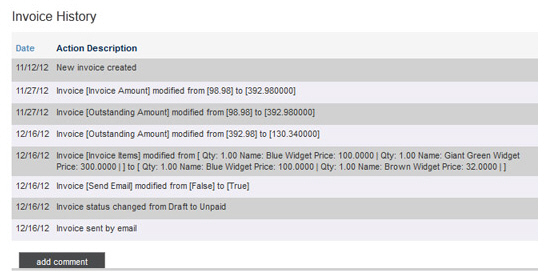
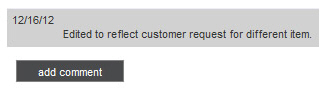
The history section of the invoice will indicate that the invoice has been created and edited but not sent, as shown below.
You can now take one of the following actions:
Click the “add comment” button to attach a comment to the invoice. When the Comments pop-up opens, type your comment in the box and click the “add” button.
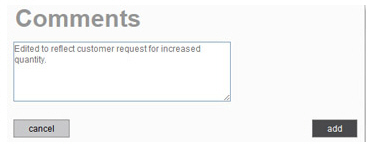
The comment is saved to the bottom of the Invoice History list.
Click the “edit” link at the top of the screen to return to the invoice and make changes.
Click
the “send” link at the top of the screen to save the invoice
and send it to your customer. After you click this link
the Select invoice send
options screen opens, and you can review and configure
invoice settings, then confirm the send by clicking the
“send invoice” button. When the invoice is successfully
saved and sent, you will see a success message in the
manage invoices screen,
as shown above.
NOTE: If you do not want
to actually send the invoice to your customer but want
to finalize the invoice, you can use the “mark as sent”
link at the top of the screen to change the Status of the invoice to “Unpaid
(Sent).”
NOTE: If you do not take either of these actions, the invoice
will remain saved as a draft, and will be accessible from
the manage invoices screen with a Status
of “Draft (Unsent).”
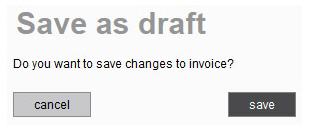
Click the “save as draft” link.
A pop-up window will appear asking if you want to save the changes you made to the invoice. Click “save.”
If there are any errors in the invoice, the system will prompt you to correct them at this point. Make any corrections, and click the “save as draft” link again.
The invoice will be saved as a Draft, and the system will then display the manage invoices screen, with a success message at the top, and the invoice you just edited at the top of the Invoices table, and will retain the Status of “Draft (Unsent),” as shown below.
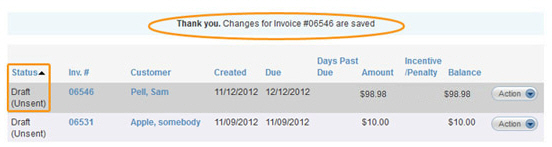
You can edit and send this invoice at a later date by repeating the steps in this section.
Cancel the changes, by clicking the “cancel” button at the bottom left of the page. None of the changes you made to the invoice will be saved, and the invoice will remain a “Draft.” You will be returned to the Invoices table.