![]()
![]()
The basic steps for processing a swipe credit card transaction using the ReceivablesPro iOS Mobile App are as follows:
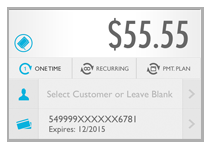
Tap Collect Payment in the Quick Menu to open the Collect Payment screen.
Attach the ReceivablesPro card swipe device (if it is not already attached).
Enter the Payment Amount.
Swipe the card.
Confirm that the card information has been recorded.
Tap Collect.
Tap OK in the confirmation modal to process the transaction.
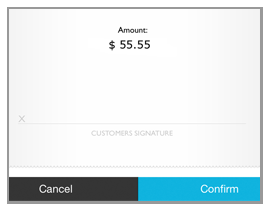
The signature screen opens. Hand the
mobile device to your customer and have them use a finger to sign
on the line and then tap the Confirm
button to authorize the transaction.
NOTE: For transactions under $25, the
customer does not need to provide an authorization signature, and
you will not see the signature screen.
NOTE: For swipe transactions processed
as MOTO (card not present), a signature is not required. Providing
your customer the ability to sign for and confirm the transaction
is currently cosmetic and included to help them feel more comfortable
about the mobile payment. If you do not want to use this feature,
it is fine to omit the signature and simply tap the Confirm button
on the screen yourself to complete the transaction.
The Transaction Result screen opens and indicates whether your transaction was authorized or whether it failed. It also indicates whether an email receipt was sent to the customer.
Tap RECEIPT DETAILS to see complete transaction details. To send (or resend) an email receipt, enter an email address (or use the one shown), and tap the SEND (or RESEND) RECEIPT button. Or tap DONE to return to a blank Collect Payment screen.
NOTE: For detailed instructions on collecting one-time payments see Collecting Payments via Swipe Entry below.
|
You can also swipe a card to create a Customer Record with a name, credit card account number, and credit card expiration date for new schedule entry. Swiping with the Recurring Payment Schedule or Payment Plan Schedule screen active will auto-fill the Customer and Payment Account fields. You must manually enter the remainder of the schedule information, as described in Entering Recurring Payment Schedules below. |
