![]()
![]()
|
Customers can pay invoices without
creating a Customer Portal account if you enable that option on
the Settings--> Configuration-->
Invoice Settings screen. (See Invoice Settings in Chapter 8.)
If they later decide to enroll in Customer Portal,
they will only be able to see a history of your invoices. None
of the invoice payments made outside Customer Portal will be attached
to their account or visible in payments history reports. |
When customers reach the invoice landing page they can click the “view and pay invoice as guest” link to make a payment without logging in.
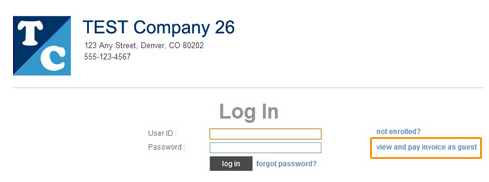
Alternately, if you have configured your system to bypass the Log In screen, they will go directly to the Invoice payment screen.
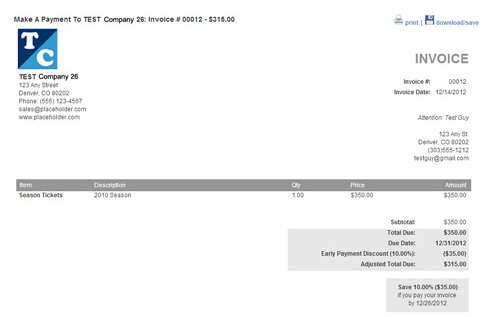
The invoice payment screen opens as shown below:
To pay the invoice:
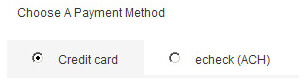
In
the Payment type section,
select either Credit Card or
Echeck (ACH) as the invoice
payment method.
NOTE: If your ReceivablesPro account
is configured for only Credit Card or only Echeck (ACH) processing
then only one payment method will be available and no selection need
be made. If both options are available, Credit Card is selected by
default.
The Amount to pay section indicates the invoice balance, and provides the opportunity to pay the invoice in full, or to make a partial payment.

By default the Full amount radio button will be selected, with the total amount of the invoice indicated. To pay the invoice in full, leave this radio button selected.
If partial payments are permitted
the Partial amount radio
button and box will also be visible. To enter a partial payment,
select its radio button and enter any amount less than the total
due in the box.
NOTE: If a partial payment is entered
for an invoice on which an Early
Payment Discount is active
it will remove the discount opportunity. A warning message to
this effect will be shown next to the Partial
amount field if a discount
is currently available, as in the screen capture above.
If a
partial payment has already been made, then the Full
amount radio button will indicate the invoice balance
(total due - partial payments). The balance can be paid, or an
additional partial payment made.
NOTE: Customers can make multiple
payments on an invoice without logging in. Each time they access
the invoice, the Balance
Remaining line on the
invoice and the Full
amount radio button will
reflect the balance due on the invoice. If they click the “PAY
INVOICE NOW” button from the invoice pdf, and the invoice has
been paid in full, $0 will be in the Full
amount field, and there
will be no “pay” button on the page for submitting a payment.
If they do not log in when making partial payments, each partial
payment will generate a new Customer Record, and the payments
will not be connected to a single customer. However, you will
see that all the payments are connected to the same invoice.
Depending on the payment method selected in step 2 above, enter account information in the fields provided.

Select the Card type from the drop-down box.
Enter the Card number.
Enter the CVV2 Code. (This is the four digit number on the front of American Express cards, or the three digit number on the back of Visa, MasterCard and Discover cards.)
Enter the card’s Expiration date using the first drop-down box for the month and the second drop-down box for the year.
Enter the Billing Zip/Postal Code associated with the card.
Leave the
Set as default account
box unchecked.
NOTE: As a new Customer Record
is created whenever an invoice is paid while a customer is
not logged in, the credit card will automatically be set as
the default account, regardless of whether the box is checked,
since it will be the only one associated with the new Customer
Record.
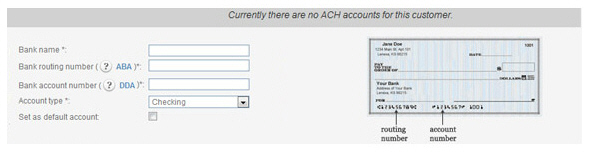
Enter the Bank name.
Enter the 9-digit Bank routing number.
Enter the Bank account number.
Select “Checking” or “Savings” as the Account type.
Leave the
Set as default account
box unchecked.
NOTE: As a new Customer Record
is created whenever an invoice is paid while a customer is
not logged in, the bank account will automatically be set
as the default account, regardless of whether the box is checked,
since it will be the only one associated with the new Customer
Record.
Enter billing name, address, and contact information in the Customer Information section.

Review the Terms and Conditions
of Sale. The merchant Terms &
Conditions are displayed in the text area. These are the
Terms and Conditions of Sale you
entered on the Settings--> Configuration-->
Invoice settings screen. (See To Enter Terms of Sale: in Chapter 8 for
details.) Customers can click the “Print Terms & Conditions” link
to print a copy if they want one.
Customers must also agree to the ReceivablesPro Buyer Terms and Conditions when
making a payment. These can be viewed and printed by clicking the
“Buyer Terms and Conditions” link.

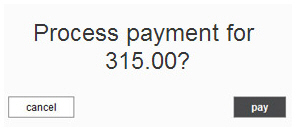
Click the “pay” button to agree to the Terms & Conditions and submit the payment.
A pop-up box will appear asking to confirm the payment amount. Click “pay” to process the payment, or click “cancel” to return to the invoice and enter a different amount.
Any errors will appear at the top of the screen. Make any required corrections and click the “pay” button again to submit the payment. When the payment is successful, the payment confirmation screen will appear as shown below. Customers will also receive an email receipt for the payment.
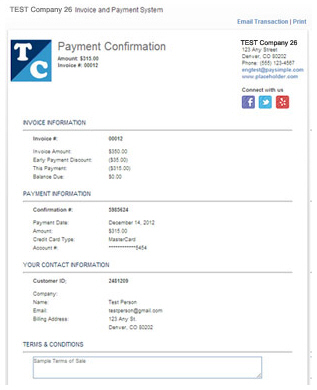
NOTE: If you configured Social Links to appear on your payment receipts
inviting your customers to connect with you on Facebook, Twitter or Yelp,
they will appear at the top-right of the confirmation screen. (See Social
Links in Chapter 8 for instructions on how to configure
these links.)
Next Section: Online Payment Forms >
