![]()
![]()
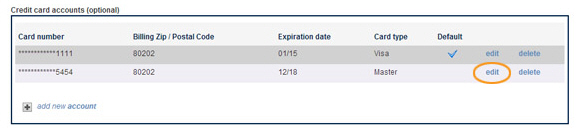
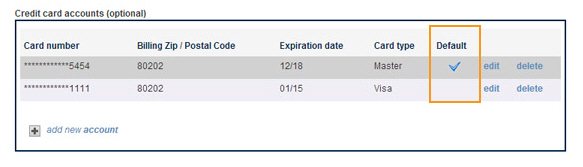
The Credit card accounts section displays a table of cards stored in the customer’s account. The table includes the truncated card number, the billing zip code attached to the card, the expiration date, the card type, and indicates which of the cards is the default credit card account. Customers can store as many credit cards in the system as they like. Each time they make a payment, they will be able to select the account to use.
To change the expiration date or the billing zip for the card:
Click the “edit” link.
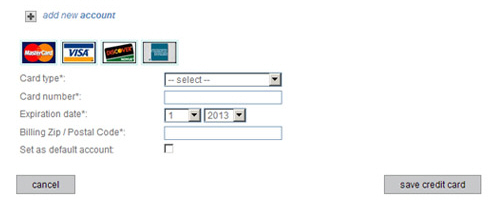
The Card type, Expiration date, and Billing Zip/Postal Code fields will be displayed below the saved cards, as shown:
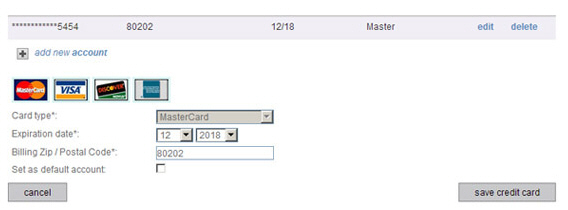
Select the new month and/or year for the credit card Expiration date using the drop-down boxes.
Enter the new Billing Zip/Postal Code for the card.
Click the “save credit card” button to save the change, or click “cancel” to discard it, and close the edit section.
To
delete a stored credit card, click the “delete” link and click “ok”
in the pop-up box to confirm the delete.
NOTE: Customers will only be able to
delete a credit card if there are no unsettled transactions currently
attached to the card. When attempting to delete a credit card attached
to a recurring payment schedule, customers will be asked to choose
a different saved card to use with the schedule. If no other credit
cards are saved, the customer will not be able to delete the credit
card.
NOTE: If a customer deletes the default credit card the most recently
added card will be set as the new default. If there are no other credit
cards, the next one added, by either you or your customer, will be
set as the default credit card.
Click the “add new account” link in the Credit card accounts section.
New fields appear under the link, as shown:
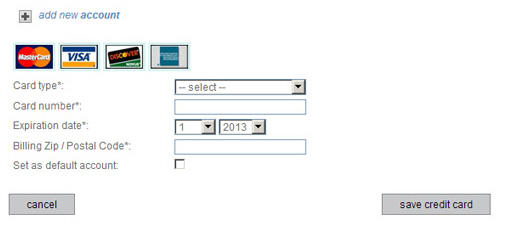
Select
the card type from the Card type
drop-down box.
NOTE: If there is a billing address
saved with the Customer Record selecting a Card type will
auto-fill the Billing
Zip / Postal Code field with
the billing zip.
Enter the credit card number in the Card number field.
Enter the card expiration date in the Expiration date field, by selecting the month in the first drop-down box, and the year in the second drop-down box.
If the Billing Zip/Postal Code field has a value, double check that it is correct and make any necessary changes. If the field is blank, enter the billing zip code associated with the credit card.
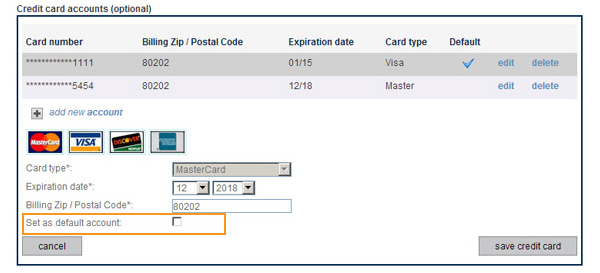
To
set the card you are adding as the default account, check
the Set as default account
box.
NOTE: If the box is checked, when
the new card is saved it will be assigned as default in place
of the previous default account. In the table the new account
will have a check in the Default column, and the previous default
account will not. If the new card is the only one attached to
the customer it will be set as the default whether or not the
box is checked. (See About Default Payment Accounts in Chapter
6 for more information
about default accounts.)
Click the “save credit card” button to encrypt and securely store the card in the system. Or click “cancel” to discard it.
The new card entry section will close, and the card will be included in the list of saved credit cards, with only the last 4 digits of the card number displayed, as shown below:

To change the default account to an existing credit card
Click the “edit” link for the credit card you want to change to the new default.
The credit card is displayed in edit mode under the table.
Check the Set as default account box.
Click the Save credit card box.
The credit card is updated in the table with the check mark in the Default column. The default tag is removed from the previous card and it no longer displays the check mark in the Default column.
To add a new account and set it as the default:
Click the “add new account” link at the bottom of the Credit card accounts table.
The new account fields open under the table.
Enter Card type, Card number, Expiration date, Billing Zip/Postal Code, and check the Set as default account box.
Click the “save credit card” button.
The new card is added to the table with the check mark in the Default column. The default tag is removed from the previous card and it no longer displays the check mark in the Default column.
