![]()
![]()
After entering payment information, be sure that the billing information is displayed correctly, and make any necessary changes.
Then review the merchant Terms and Conditions and the Buyer Terms and Conditions and click the “pay” button at the bottom right of the invoice to submit the payment. (Customers can click the “Print Terms & Conditions” link to print a copy of the merchant Terms & Conditions if they want one.)

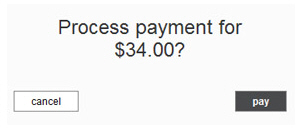
A pop-up box will appear asking to confirm the payment amount. Click “pay” to process the payment, or click “cancel” to return to the invoice and enter a different amount.
Any errors will appear at the top of the invoice screen. Make required corrections and submit the payment again.
A receipt screen will appear providing the current status of the invoice and a Confirmation # for the payment. The “Email Transaction” link can be used to email the receipt to any email address(es) you choose; and the “Print” link can be used to open the default printer to print this screen.
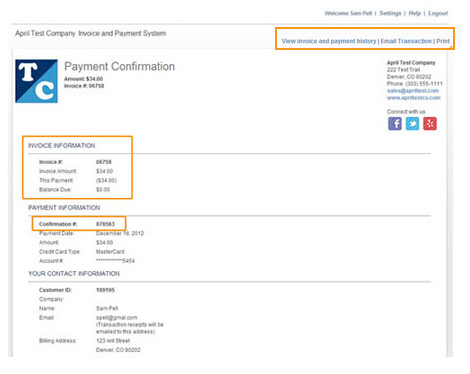
NOTE: If you configured Social Links to appear on your payment receipts inviting your customers to connect with you on Facebook, Twitter or Yelp, they will appear at the top-right of the confirmation screen. (See Social Links in Chapter 8 for instructions on how to configure these links.)
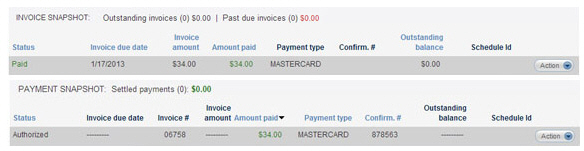
Click the “view invoice and payment history” link at the top-right of the screen to return to the invoices tab. The paid invoice will appear in the Invoice table, marked as “Paid” if the full amount was paid, or “Paid (partial)” if only a partial amount was paid.
There will also be a new entry in the Payments table for the payment used to settle the invoice, as shown:
Next Section: Invoice Emails >