![]()
![]()
ReceivablesPro sends a variety of email templates to your customers on your behalf. A full list of these templates can be found in Appendix D: Email Templates. Some of these emails, such as the Customer Portal password reset email are not accessible for viewing or editing. However, most of the email templates used in your ReceivablesPro system can be viewed and edited so that you can customize them for your business needs.
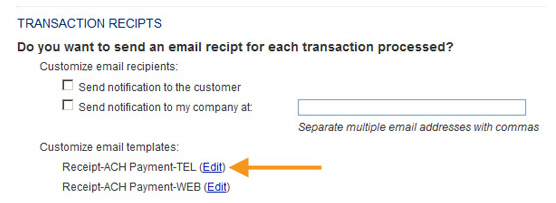
The Select Email Options And Edit Templates screen, each section lists the email templates that are governed by the configuration settings in that section. To view or edit the template, simply click the “edit” link to the right of the template name.
The Edit Email Template screen opens and displays the email subject and body text, as shown below.
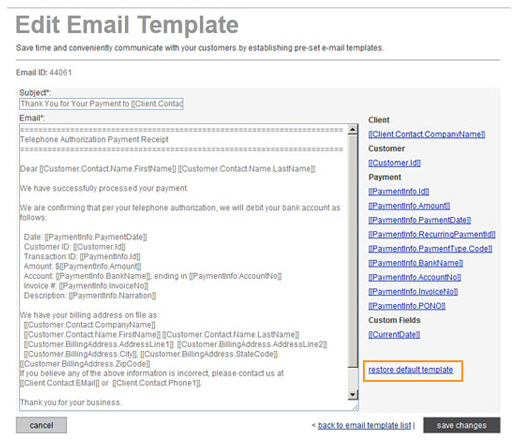
Note that the body text contains merge fields for much of the pertinent information. These merge fields will be used to customize the email based on details for individual accounts, settings, and customers.
You can make the following changes on this screen. (Be sure to click the “save changes” button at the bottom of the screen to save your changes.)
You
can change the email Subject by
editing or replacing the default text. Note that you can use merge
fields in the subject line.
NOTE: The default emails in your
ReceivablesPro account
use a merge field for your company name. This is done to ensure that
emails are customized for your business out of the box. You can replace
the merge field with static text if you like. For example, instead
of “Thank You for Your Payment to [[Client.Contact.CompanyName]]”
you could edit the
Subject line to “Thank You
for Your Payment to Example Company.”
Edit the
Email body to make any
text changes you like. You can also add, remove, or change merge fields.
This is a text email, so you cannot include HTML elements such as
bold or underlined text.
NOTE: The default emails loaded into
your ReceivablesPro account
use merge fields for your company information to provide customized
content for your business out of the box. You can replace the merge
fields with static text. For example, instead of keeping the merge
fields in the email signature, you can replace them with a static
signature. Look for merge fields that begin with “Client.” to identify
fields that are merging information about your company.
A
subset of available merge fields is listed to the right of the Email
body field. To place one of these in your email, place your cursor
at the insertion spot in the Email body field, then click the merge
field you want to insert.
A full list of available merge fields can be found in the Catalog of Email Merge Fields section
of Appendix D: Email Templates. To use
these merge fields, copy the merge text from Appendix
D and paste it into the Email body.
You can restore an edited email to its original content at any time by clicking the “restore default template” link located to the right of the Email body field. (Orange highlight in above screen capture.)