![]()
![]()
Web Payment Buttons can be text links or graphic
buttons that link to specific Web Payment Pages. They can be placed on
any page of your website, or added to promotional emails.
NOTE: To place a graphic button in an email,
you must use HTML email format, and have access to the HTML code.
When customers click this button on your website or in an email they will be sent to the linked Web Payment Page.
|
You
must have at least one Web Payment Page BEFORE you create a Web
Payment Button. (As long as you don’t delete the default Web Payment
Page you’re fine to start creating buttons.) |
A default Web Payment Button is created when your ReceivablesPro account is enabled. It is linked to the default Web Payment Page. You can use it as is, or make changes as required. (See The Default Web Payment Button below for detailed information.)
The WEB PAYMENT BUTTONS table, located at the bottom of the Web Payment Pages dashboard, provides a list of all buttons created in your account.
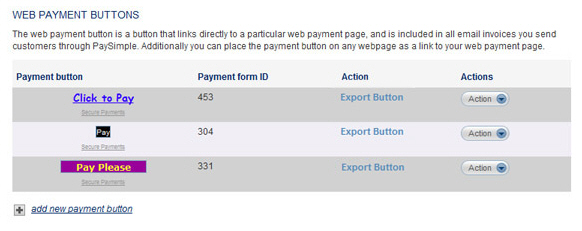
The table contains the following columns, none of which are sortable:
Payment
button-- Displays a preview of how the button will appear on
web pages.
NOTE: In the above screen capture, the
bottom two rows contain graphic buttons, and the top row contains
a standard link.
Payment
form ID-- Displays the ID for the Web Payment Page to which
the button is linked.
NOTE: To view the ID for a Web Payment
Page, open it in edit mode. The heading on the screen will provide
the ID. (See Edit a Web Payment Page.)
Action-- Click the “Export Button” link in this column to copy the button code to your computer’s clipboard. Once you do this, you can paste the code into a web page or email.
Actions-- This menu provides access to edit and delete functions. Click the Action button, then click the link for the function you want to use.
The following sections detail how to add, export, edit and delete Web Payment Buttons.
