![]()
![]()
In some cases when an invoice has a negative Balance Due, you have actually collected funds correctly and need to adjust the invoice Total Due to match the Payments Made rather than using the Zero Balance function (which changes the Payments Made to match the Total Due--See above).
Follow the steps below--they are a little cumbersome, but they get the job done.
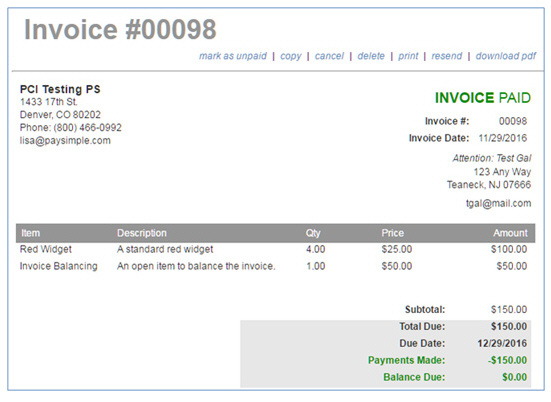
Begin with a negative balance Paid invoice, such as the one shown below:
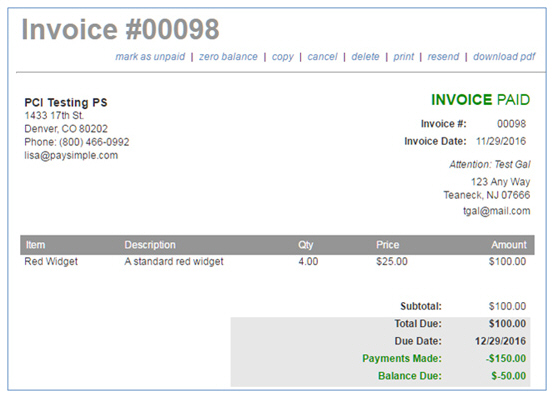
In this case we actually collected $150, so want to edit the invoice
to change the Total Due to
$150.00.
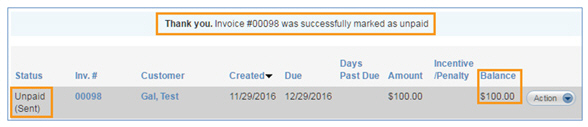
Click the "Mark
as Unpaid" link in the top Action menu.
NOTE: You cannot edit an invoice with
a "Paid" Status, so we need to mark the invoice as unpaid
in order to change it.
You are returned to the Invoices table. The invoice Status is now "Unpaid" and the Balance is $100.00.
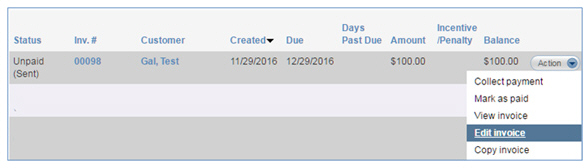
Select "Edit invoice" from the Action button menu to open the invoice in edit mode.
With the invoice open, click "add another line" in the Goods and Services section.

Add an Invoice
Balancing Item to the invoice. (Alternately, you can simply edit the
Price of an Item to the
desired amount. If you do this, go to step 8.)
NOTE: These steps assume you do not have
an Invoice Balancing Item saved. If you do, go to step 7.
Select "Add New Item" from the Name drop-down box.
In the Add Goods & Services modal, enter "Invoice Balancing" as the Item name, include a Description, and enter a holding Price of $1.00)

Click the "save and select" button.
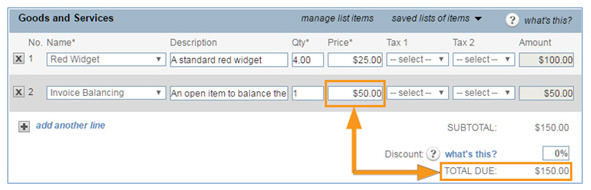
The Invoice Balancing Item is now added to the invoice. In the Price field, enter the adjustment amount. In this example, we are adding $50 to the invoice in order to get a Total Due of $150.00.
Click the "save and re-send" button to save the invoice. Then on the Collect Invoice Send Options screen, click the "send invoice" button.
You are returned to the Invoices table, with the Invoice Status set to "Unpaid," the Amount set to $150, and the Balance set to $150.

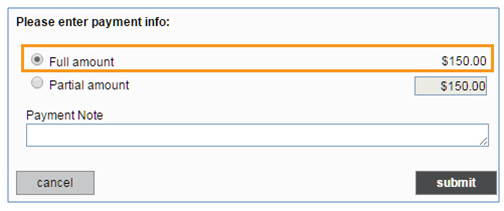
Select "Mark as Paid" from the Action button menu, and in the modal leave the "Full amount" radio button selected and click "submit."
The invoice Status updates to "Paid" and there is again a negative Balance. (Don't worry, we're about to fix that.)

Click the linked Inv.# to open the invoice.
Click "zero balance" in the top Action navigation bar.

You are returned to the Invoices table, and the invoice now has a Balance of $0.

When you view the invoice, it now reflects the desired Total Due, Payments Made, Balance Due, and Status, as well as the Invoice Balancing Item (if used).
Next Section: Managing Recurring Invoices >