![]()
![]()
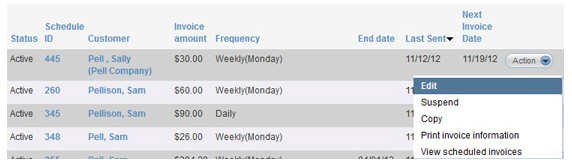
You can edit any active invoice schedule. When you do this, the changes you make will take effect with the next scheduled invoice. When the edit option is available, you will see an “Edit” link under the Action button menu on the Recurring Invoices table, as shown below.
Follow these steps to edit an active recurring invoice schedule:
Click the “Edit” link under the Action button menu for the schedule you want to edit.
The schedule will open in edit mode. You can make changes to any of the following fields:
Customer-- You can change the customer to which the schedule is attached.
P.O. Number
Payment terms
Frequency, and any frequency sub-selects (day of week or day of month)
Start
date
NOTE: You can only make changes to
the Start
date if the schedule
has not yet started. If it has started, this field will not be
editable. You will only be able to change the Start date to
one that matches the schedule frequency. For example, if you schedule
sends on the first of each month you will be able to select a
Start
date of May 1 or June 1,
but not June 2.
End date
Early Payment Discount
Late Payment Fee
List items in the Goods and Services section:
Change quantities of items
Change or eliminate Tax 1 and/or Tax 2
Add List Items
Delete List Items
Edit unit prices.
Edit item descriptions
Discount
Note for customer
When you are finished making changes, do one of the following:
Save the schedule.
Click
the “save recurring schedule” button.
NOTE: If there are any errors,
the system will prompt you to correct them at this point.
Make any necessary corrections and click the “save recurring
schedule” button again.
The Recurring invoice send options window opens.
The top portion of the screen contains send configuration settings.
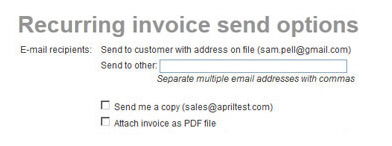
Review the send settings and make any required changes, then click the “save recurring invoice” button to save the changes to the schedule.
You will be returned to the manage recurring invoices screen, and you will see a success message at the top of the table. Any changes to invoice amount, frequency, or dates will be reflected in the table.”
Preview the edited invoice schedule
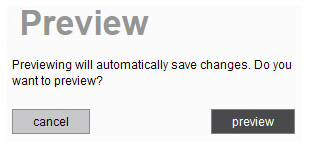
Click the “preview” link.
A pop-up message will appear asking if you want to save the changes to create the preview. Click the “preview” button.
If there are any errors in the schedule, the system will prompt you to correct them at this point. Make any corrections, and click the “preview” link again.
The preview will appear and reflect any changes you made in the schedule.
Click the “go back to scheduled invoice #” button to return to the invoice schedule and make changes.
Click the “save recurring invoice” button to save and activate the invoice schedule. After you click this button the Recurring invoice send options window opens. Make any required changes then click the “save recurring invoice” button to confirm the changes. When the schedule is successfully updated, you will see the success message in the manage recurring invoices screen, as shown above.
Click the “cancel” button to discard your changes and return to manage recurring invoices screen.