![]()
![]()
Once you have installed the swiper, you can use it for entering credit card accounts for one-time payments.
When you swipe the card the a masked version of the card number showing just the last 4 digits, the card Expiration date, and the card type will be displayed in the swiper box, as shown.
This information,
along with track data if your account is enabled for Retail (card present)
processing, is held in temporary memory while you complete the transaction.
NOTE: The system checks to see whether it
has already stored the swiped card before saving so that you do not get
duplicate accounts saved for the Customer.
Once a credit card account number is stored
with a Customer Record, along with its associated Billing Zip/Postal Code,
you can use that credit card account to process future payments without
having to swipe it again.
NOTE: If your system is enabled for Retail (card present) processing, you
should always swipe the card when possible in order to get the added security
of having the track data on file for the transaction.
The basic steps for processing a swipe credit card transaction using as follows:
Open the Collect Payment screen.
Attach the USB card swipe device (if it is not already attached).
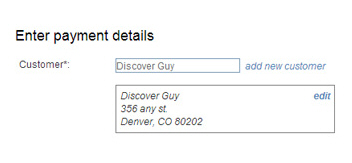
Select the Customer you want to charge.
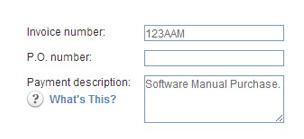
Enter an Invoice number and P.O.
number if you have them. Be sure to enter a description
of the products and services for which you are charging in the Payment description field.
NOTE: Payment
description is not a required
field, but you must enter a description of your products and services
here in order to have them printed on your transaction receipt. Including
a description of the products and services sold is a requirement for
card-present Retail swipe transactions.
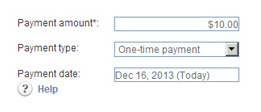
Enter the Payment Amount.Leave the Payment type as “One-time payment” and the Payment date as the current date.
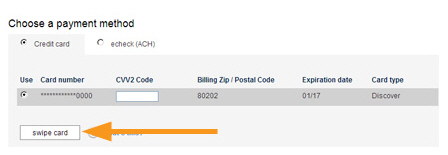
Click the swipe card button to open the Credit Card Swiper box.
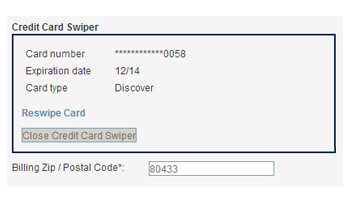
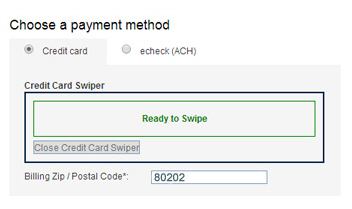
The credit card table and new card entry fields are hidden and replaced with the Credit Card Swiper box, which should indicate that the system is ready to receive swipe input, as shown below. Swipe the card.
The box will
now display a masked version of the card number showing just the last
4 digits, the card Expiration date,
and the Card type. If the
data did not get recorded correctly, or if the Customer simply wants
to use a different card, click the “Reswipe Card” link to clear the
data so that you can swipe again.
NOTE: DO NOT click the “Close Credit
Card Swiper” button unless you want to cancel the swipe transaction
completely. Clicking this button causes the system to completely clear
all swiped data from memory without saving anything.
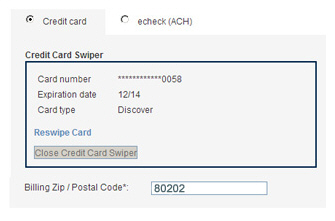
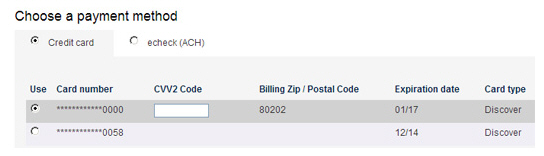
The Billing
Zip / Postal Code field for swiped cards will display
the Billing Zip attached
to the selected Customer Record. If this is the correct billing zip
code for the card, leave it as is. If the card has a different Billing Zip, or if the field is
blank because there is not a Billing
Zip stored with the Customer Record, enter the correct zip
code in the field.
NOTE: You must enter a valid zip or postal
code in the field in order to process the payment.
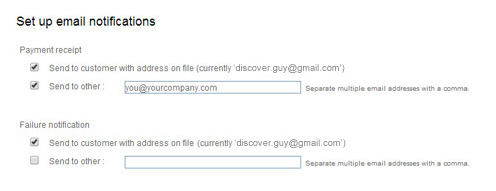
Review the receipt
and failure notification email settings and make any required changes.
NOTE: The system will automatically send
the card-present credit card receipt if you swiped a credit card to
enter the transaction.
Click the Collect Payment button.
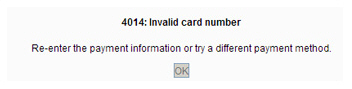
If there are errors with the transaction, or if the payment is not authorized, you will see an error message like the one below. Follow the instructions in the error message to fix the problem or to use a different payment method for the transaction.
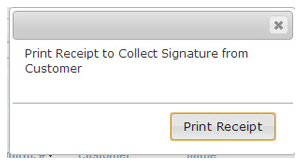
If the transaction is successful, you will see a pop-up window, with a Print Receipt button. Click the button to open the receipt screen.
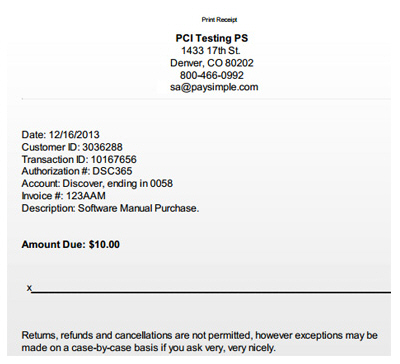
The receipt
screen opens as shown below. Note that the Payment
description you entered earlier is included on this receipt
as your description of goods and services.
NOTE: The Terms
of Sale included at the
bottom of the receipt are custom configurable, and you should be sure
to edit the default text to accurately describe your business practices.
These Terms
of Sale can be viewed and
edited from the Settings-->Configuration-->Swiped
Transaction Settings section.
(See Swiped Transaction Settings section in Chapter
8 for instructions.)
Print
the receipt screen, and have your customer sign the printed page to
authorize the transaction. Keep the signed receipt on file for at
least one year as proof of authorization.
NOTE: It is a good idea to make a copy
of the signed receipt and provide it to your customer.
NOTE: For swipe transactions processed as MOTO (card not present),
you still need to obtain a signature in order to properly authorize
the transaction.
Once you print the receipt and close the receipt screen, you are returned to the manage payments screen. There will be a message above the table verifying that the transaction was successfully entered. The new transaction will be at the top of the Payments table with a Status of “Authorized,” as shown below.

Once the transaction is completed, the system discards the Track Data it collected from the swipe. However, the system does save the card number, card type and expiration date and attaches the swiped card to the Customer Record, if it is not there already.
You can now use this card for other one-time payments or recurring payment schedules without having to swipe it again.