![]()
![]()
The Status filter for the Schedules screen is used to display all payments with a single status. It can be used alone or in conjunction with the Customer and/or Date filter.
The following status filters are available.
All-- If there is no Status filter set, all statuses are returned. There is no select for “All.” You need to clear the Status filter to get there.
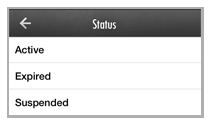
Active-- Schedules that are currently enabled and generating payments.
Expired -- Schedules that have reached their end date (or Payment Plans for which all payments have been generated) and are no longer generating payments.
Suspended-- Schedules that have been manually disabled and are not currently running. This includes schedules suspended indefinitely, and those you have paused until a specific date.
Follow the steps below to enter a Status filter:
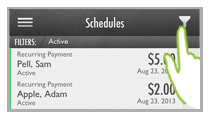
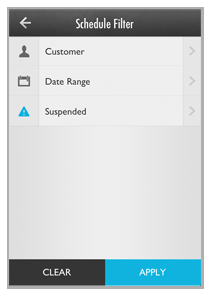
From the Schedules screen, tap the Filter icon.
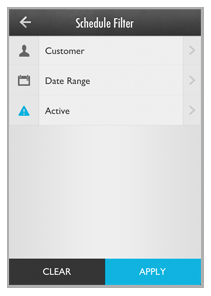
The Schedule Filter screen opens.
NOTE: The Status icon is blue to indicate that an active filter is applied to that field.
Enter or change the Status filter.
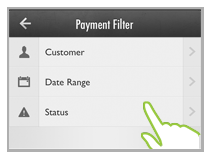
If the Status filter is not set, or if it is set to a value different from the filter you want to set, Tap Status (or the current value in the third filter field).
If the Status filter is set, and you want to return all statuses, tap Clear and go to Step 6.
NOTE: This will clear all filters, not just the Status filter. However, it is the only way return all statuses in your search results.

The Status screen opens. Tap the Status you want to use.
You are returned to the Schedule Filter screen, and the Status you selected is shown in the last Filter field.
Tap Apply.
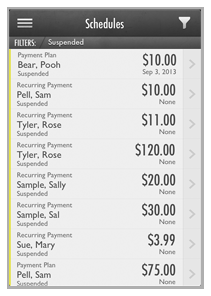
You are returned to the Schedules screen, and the schedules list is filtered to display only those schedules for the Status you selected.
NOTE: The currently applied filter is displayed in the gray bar above the schedules list.
To change the Status filter, tap the Filter icon then repeat the above steps.
To completely clear the Status filter, tap the Filter icon, tap Clear on the Schedule Filter screen, then when the fields clear tap Apply. Alternately, tap “Schedules” in the Quick Menu to return the screen to showing all Active schedules sorted by Next Payment Date.