![]()
![]()
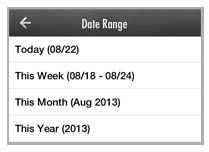
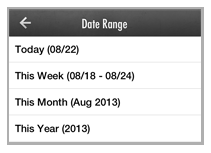
The Date filter for the Schedules screen is used to display all schedules that will generate a payment in a a given date range. It is based on the Next Payment Date field. It can be used alone or in conjunction with the Customer and/or Status filter.
The following filtered views are available.
Today:
Displays all schedules with a Next Payment Date on the current calendar
day.
NOTE: The scheduler that generates payments
runs at approximately 2AM Eastern Time, so schedules will only appear
using this filter after midnight and before the current day’s scheduler
run.
This Week: Displays all schedules with a Next Payment Date in the current calendar week. (Sunday - Saturday)
This Month: Displays all schedules with a Next Payment Date in the current calendar month.
This Year: Displays all transactions with a Next Payment Date in the current calendar year.
|
Schedules will likely appear in multiple filters. For example, a schedule that is configured to generate a payment on the first of each month may show up in all four of the categories at midnight on the last day of the month, but only show up in This Year on the third day of the month. |
You will always be shown the exact dates covered by a date filter. (The range is indicated just to the right of the filter description, as shown below.)
To apply a Date filter, follow the steps below:
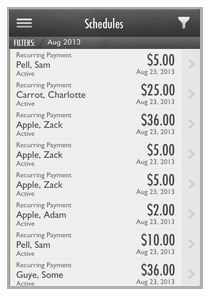
From the Schedules screen, tap the Filter icon.
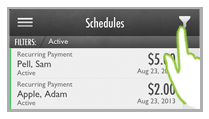
The
Schedule Filter screen opens.
NOTE: The screen will open with the current
active filters displayed. Since we are accessing the screen from the
default Schedules
list, the Status filter (the
third entry in the list) is set to “Active.” If you want to view schedules
of all statuses for a Customer, tap Clear
to clear the Status filters prior
to setting the Date Range filter. Remember that Expired schedules
will never be returned based on a Date Range filter, because by definition
they do not have a Next Payment Date
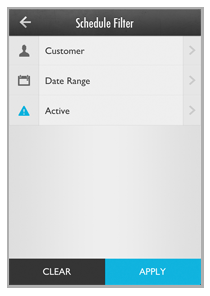
.
Tap Date Range.
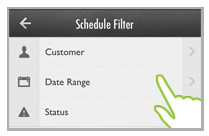
The Date Range screen opens. Tap the range you want to use.
You are returned
to the Schedule Filter screen,
and the rage you selected is shown in the second Filter field
NOTE: The Date Range icon turns blue
to indicate that an active filter is applied to that field.
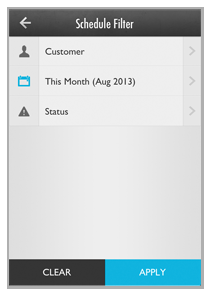
Tap Apply.
You are returned
to the Schedules screen, and
the schedules list is filtered to display only those schedules with
a Next Payment Date in the date range you selected.
NOTE: The currently applied filter is
displayed in the gray bar above the transactions list.
To change the date filter, tap the Filter icon then repeat the above steps.
To completely clear the date filter, tap the Filter icon, tap Clear on the Schedule Filter screen, then when the fields clear tap Apply. Alternately, tap “Schedules” in the Quick Menu to return the screen to showing all Active schedules sorted by Next Payment Date.
