![]()
![]()
The Date filter for the Payments screen is used to display all payments entered in a given date range. It can be used alone or in conjunction with the Customer and/or Status filter.
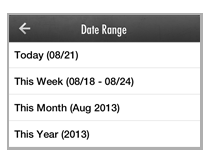
The following filtered views are available:
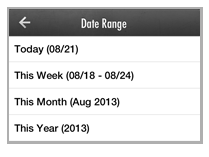
Today: Displays all transactions for the current calendar day.
This Week: Displays all transactions for the current calendar week. (Sunday - Saturday)
This Month: Displays all transactions for the current calendar month.
This Year: Displays all transactions for the current calendar year.
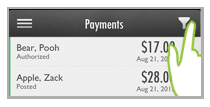
You will always be shown the exact dates covered by a date filter. (The range is indicated just to the right of the filter description, as shown below.)
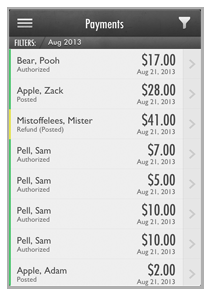
For each date range filter, the results list will display all transactions that fall in the range, starting with the first 20. Scroll to the bottom of the list and drag the last entry up to see which set of 20 you are on. Release to add the next 20 transactions to the view list.
To apply a Date filter, follow the steps below:
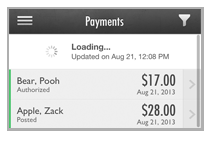
From the Payments screen, tap the Filter icon.
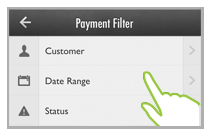
The Payment Filter screen opens.

Tap Date Range.
The Date Range screen opens. Tap the range you want to use.
You are returned to the Payment Filter screen, and the rage you selected is shown in the second Filter field.
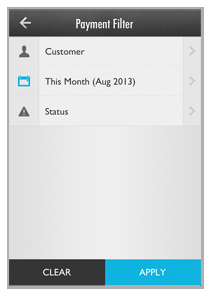
Tap Apply.
You are returned
to the Payments screen,
and the transactions list is filtered to display only those transactions
for the date range you selected.
NOTE: The currently applied filter is
displayed in the gray bar above the transactions list.
To change the date filter, tap the Filter icon then repeat the above steps.
To completely clear the date filter, tap the Filter icon, then tap Clear on the Payment Filter screen, then when the fields clear tap Apply.