![]()
![]()
The Customer filter for the Schedules screen is used to display all schedules for a single Customer Record. It can be used alone or in conjunction with the Date and/or Status filter. To apply a Customer filter, follow the steps below:
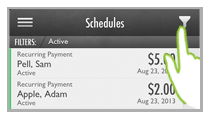
From the Schedules screen, tap the Filter icon.
The Schedule Filter screen opens.
NOTE: The screen will open with the current active filters displayed. Since we are accessing the screen from the default Schedules list, the Status filter (the third entry in the list) is set to “Active.”
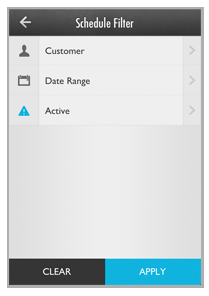
If you want to view schedules of all statuses for a Customer, tap Clear to clear the Status filter prior to setting the Customer filter. The screen with no filters set is shown below.
Tap Customer.
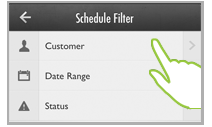
The Customers screen opens in browse mode.
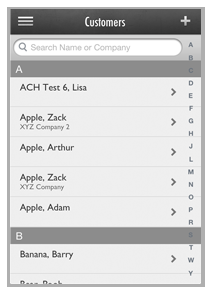
Locate the Customer whose schedules you want to see using one of the following methods:
Scroll though the list of customers until you find the customer you want. Tap the customer name to set it as the filter.
NOTE: Customers are listed alphabetically (last name first) and grouped by first letter of last name.
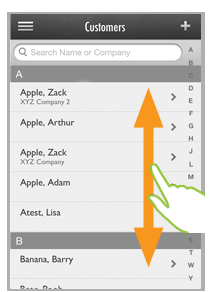
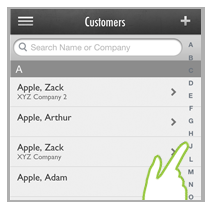
Tap one of the letters in the far right column to go to that customer group. Then scroll to locate the customer you want. Tap the customer name to set it as the filter.
Search for the customer using the search bar at the top of the screen. You can search by customer first name, last name or company name. Follow the steps below.
Touch the search bar to open the keyboard.
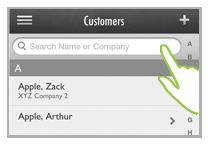
Begin typing any portion of the customer’s name or company name.
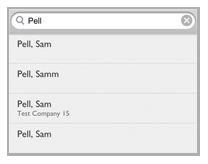
Matches will begin appearing below the search bar and above the keyboard.
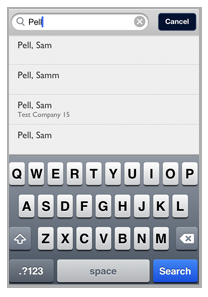
If you see the customer you want, tap it to close the keyboard and set it as the filter.
If there are too many matches to display above the keyboard after you have typed the complete search string, tap the blue Search button at the bottom right of the screen. This will close the keyboard and display the full list of matches from which you can select. Scroll through the list to locate the customer you want to filter by, then tap it to set it as the filter.
NOTE: To refine the search, tap the Search bar at any time to open the keyboard and enter additional search text. To return to the browse screen, tap the Cancel button to the right of the Search bar.
You are returned to the Schedule Filter screen, and the customer you selected is shown in the first Filter field.
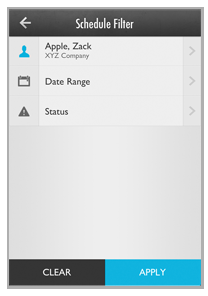
Tap Apply.
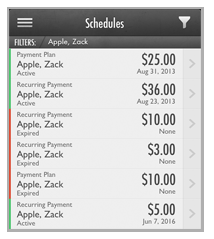
You are returned to the Schedules screen, and the schedules list is filtered to display only those schedules for the customer you selected.
NOTE: The currently applied filter is displayed in the gray bar above the schedules list.
To change the customer filter, tap the Filter icon then repeat the above steps.
To completely clear the customer filter, tap the Filter icon, then tap Clear on the Schedule Filter screen, then when the fields clear tap Apply. Alternately, tap “Schedules” in the Quick Menu to return the screen to showing all Active schedules sorted by Next Payment Date.