![]()
![]()
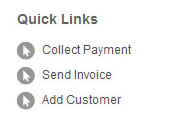
Individual customers are added to ReceivablesPro from the add new customer screen. This screen can be accessed in three ways:
Clicking the “Add Customer” Quick Link in side navigation.
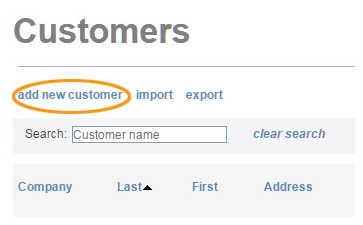
From the Customers center. Click the “add new customer” link at the top of the table.
From the send
new invoice or the collect
new payment screen. Click the “add new customer” link
that appears next to the Customer search
box.
NOTE: Clicking the link will open the
Add New Customer screen. When you’ve saved the customer,
the system will return you to the screen you were on with the customer
you just added active.

Click any “add new customer” link.
The add new customer screen opens with all fields blank.
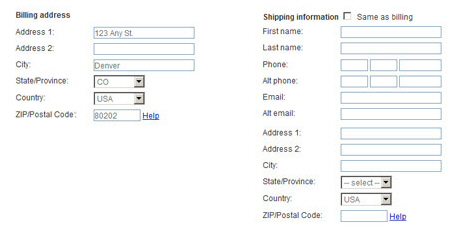
The top portion of the form is used for customer contact information and custom fields.
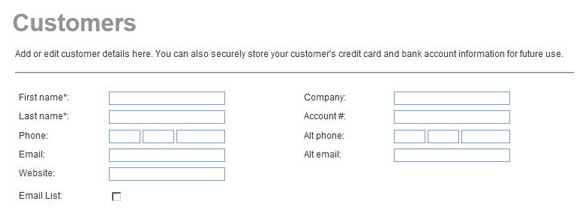
First name: Enter your customer’s first name. (Required, 25 character maximum)
Last name: Enter your customer’s last name. (Required, 25 character maximum)
Company: If this is a business
customer, enter the name of the business in the field. For a consumer,
leave this field blank. (30 character maximum)
NOTE: You can use Company name when
searching for a customer in any ReceivablesPro search
field.
Account #: If you have an internal account number assigned to this customer, enter it in this field.
Phone: Enter your customer’s primary 10-digit phone number, area code first.
Alt phone: Enter an alternate 10-digit phone number, area code first. Extensions are not supported.
E-Mail: Enter a valid email
address for the customer. While this field is not required, you
will not be able to create an emailed invoice or invoice schedule
for any customer without an email address.
NOTE: If you attempt to enter an
invoice or invoice schedule for a customer without a saved Email address,
the system will prompt you to enter one.
Alt email: Use this field to store an additional email address for your customer.
Website: Your customer’s website address.
Custom Fields: In the above
example “Email List” is a custom checkbox field. Any custom fields
you enter for the Customer Record will be displayed vertically
at the bottom of the right-hand column.
NOTE: To learn more about custom
fields see Custom Fields in Chapter 8.
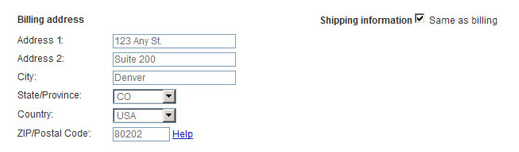
Completing
the Billing address section
is optional.
NOTE: If you enter values in any of the
Billing address fields, the system will validate the
address and display an error if the address is invalid. So for example,
an error will be displayed if you only enter a value in the Zip/Postal Code field.

Enter the customer’s street address in the Billing Address 1 field.
Enter an apartment, suite, or floor number in the Billing Address 2 field.
Enter the city for your customer’s billing address in the City field.
Select
the State/Province for your customer’s billing address in the
State/Province drop-down
box. This is a required field.
NOTE: The default selects in this
field are U.S. states and territories. To select a Canadian province,
select “Canada” in the Country field.
The Country field defaults to “USA.” Select “Canada” in this field for Canadian addresses.
Enter
the 5-digit zip code for your customer’s billing address in the
Zip/Postal Code field.
For Canadian addresses, enter the Canadian postal code, without
any spaces or dashes.
NOTE: You can enter a 9-digit (Zip-4)
zip code. If using Zip-4, enter all 9 digits in a single string,
i.e. xxxxxxxxx. This is the way the zip code will appear on all
invoices and receipts sent to your customers. ReceivablesPro
does not support the Zip-4 format of xxxxx-xxxx.
The zip/postal code you enter here will be used to auto-fill the
Billing
Zip/Postal Code field
for all credit cards you enter for this customer.
The default setting for Shipping information is to set it exactly the same as billing information, which is indicated by the checked “Same as billing” checkbox. The following options are available for shipping address:
Leave
the default setting to keep all shipping information the same
as billing information. You do not need to take any action to
maintain these settings.
NOTE: Updates to billing information
will be copied to shipping information as long as the “Same as
billing” box is checked at the time they are saved. If Billing address fields are blank, Shipping address fields
will be blank, but other fields like name and Email will
be copied from the main contact information.
NOTE: If you ever customize or clear shipping information, check
the “Same as billing” box at any time to re-set it to match billing
information.
Remove all shipping information (set all shipping fields to blank).
Uncheck the “Same as billing” box.
The Shipping information fields will appear and all will be blank.
Save the Customer Record without adding data to any of the fields.
Customize shipping information. You can enter values for the following fields:
First Name-- Max. 25 characters.
Last Name-- Max. 25 characters.
Phone
Alt. phone
Alt. email
Address 1-- Enter the street address used for shipping.
Address 2-- Enter secondary shipping address information such as apartment#, suite # or floor.
City-- Enter the city for the shipping address.
State/Province-- Select
the State/Province for your customer’s billing address in
the State/Province
drop-down box. This is a required field.
NOTE: The default selects in
this field are U.S. states and territories. To select a Canadian
province, select “Canada” in the Country field.
Country-- This field defaults to “USA.” Select “Canada” for Canadian addresses.
Zip/Postal Code-- Enter
the 5-digit zip code for your customer’s billing address in
the Zip/Postal Code field.
For Canadian addresses, enter the Canadian postal code, without
any spaces or dashes.
NOTE: You can enter a 9-digit
(Zip-4) zip code. If using Zip-4, enter all 9 digits in a
single string, i.e. xxxxxxxxx. This is the way the zip code
will appear on all invoices and receipts sent to your customers.
ReceivablesPro does
not support the Zip-4 format of xxxxx-xxxx.
The Notes text area is an open field in which you can enter any information about the customer you would like to store. For example, you might enter information about spouses or children, the time of day best to reach the customer, special requests, etc.

Store one or more Credit
card accounts in the system for this customer. All stored
credit card accounts will be available to use when you enter a payment
or payment schedule in ReceivablesPro,
or when your customer logs-in to make a payment.
NOTE: If your ReceivablesPro account
is not configured for credit card transactions, you will not see this
section.
When you are entering a customer for the first time, the Credit card accounts section is displayed in new-card-entry mode, as shown below. To add a new credit card:
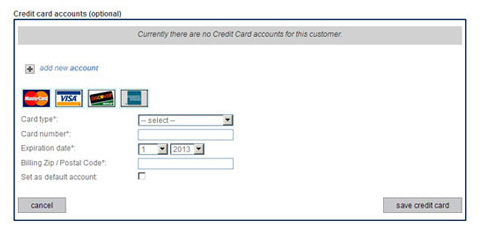
Enter credit card information.
Enter credit card information: Select the Card type from the drop-down box, enter the account number in the Card number field, select the month and year for the Expiration date, and enter the Billing Zip/Postal Code associated with the card billing address. (Supported card types include American Express, Visa, MasterCard and Discover, though your account may not be enabled for all of these options.)
As this is a new customer, whether
or not the Set as default
account checkbox is checked, the credit card
you enter will be saved as the default account.
NOTE: When you add additional
credit cards you will be able to choose the one assigned
as the default.
Click the “save credit card” button to add the card. You can also click the “cancel” button to clear all fields without saving.
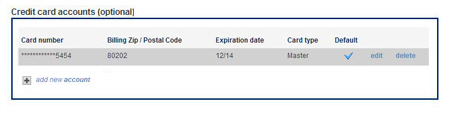
The
system encrypts and securely stores the credit card number. You
will now see it listed as an available card in the system, as
shown below.
NOTE: If you make a mistake when
entering the card, just click the “edit” link to correct the Expiration date or Card
type, or the “delete” link
to delete the card entirely.
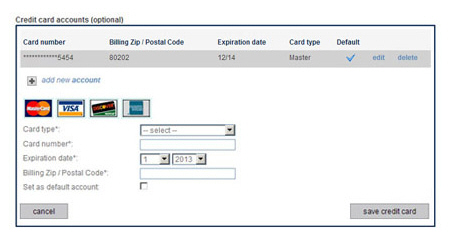
To
add additional credit cards, click the “add new account” link,
and fields for adding a new credit card will appear below the
link.
Enter the new card as described in Step a. (If you want to set
the new card as the default credit card, check the
Set as default account box when entering account information.)
If you want to cancel the new card entry without saving it, click
the “cancel” link to close the section without saving the card.
There is no limit to the number of credit cards that can be saved
with the Customer Record.
|
You
must click the “save credit card” or “save bank account” button
each time you enter a new account in order to encrypt and
save it. You need to do this in addition to clicking the “save changes” button at the bottom of the screen. |
Store one or more Bank
Accounts in the system for this customer. All stored bank
accounts will be available to use when you enter a payment or payment
schedule in ReceivablesPro,
or when your customer logs-in to make a payment.
NOTE: If your ReceivablesPro system
is not configured for echeck (ACH) transactions, you will not see
this section.
When you are entering a customer for the first time, the echeck (ACH) accounts section is displayed in new-account entry mode, as shown below. To add a new bank account:
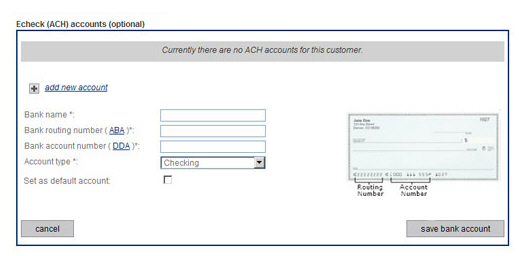
Enter the name of the bank in the Bank name field.
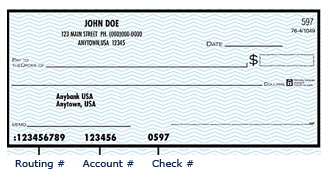
Enter
the Bank routing number—the
routing # is the 9-digit number that identifies the bank.
See the sample check below for the most common location of
the routing number.
NOTE: When you save the bank
account, the system will do a routing number validation check
to make certain that the number you entered is a valid bank
routing number.
Enter the Bank account number—See the sample check below for the most common location of the bank account number.
In the Account type drop-down list, select “Checking” for a checking account, or “Savings” for a savings account.
As this is the first bank account
you are entering, it will be set as the default bank account
whether or not the Set
as default account box is checked.
NOTE: When you add additional
bank accounts you will be able to choose the one assigned
as the default.
Click the “save bank account” button to save the new bank account.
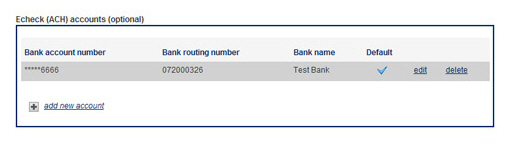
The
system encrypts and securely stores the bank account number, and
you now see it listed as an available account in the system, as
shown below.
NOTE: If you make a mistake when
entering the bank account you cannot edit the bank name, routing
number, or account number. You will have to delete the account
and create a new one with the correct information.
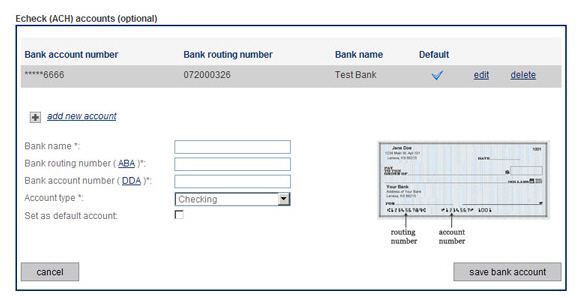
To add additional bank accounts click
the “add new account” link, and fields for adding a bank account
will appear below the link.
Enter the new account as described in Step a.above. (If you want to set
the new account as the default bank account, check the
Set as default account box when entering account information.)
If you want to cancel the new account entry without saving it,
click the “cancel” link to close the section without saving the
account. There is no limit to the number of bank accounts that
can be saved with the Customer Record.
When you are finished entering information on the add new customer screen, click the “save changes” button at the bottom of the page. To discard the customer without saving it, click the “cancel” button, or click the “back to customer list” link.

When the customer is successfully saved, you’ll be returned to the main Customers screen, or to the page you were on when you clicked the “add new customer” link.
Next Section: Importing a Customer Batch >
