![]()
![]()
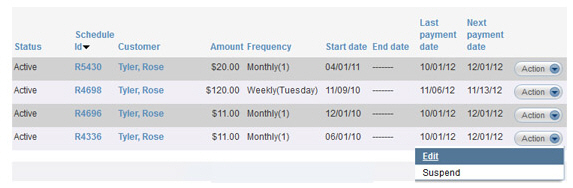
You can edit any Recurring Billing schedule after it has started in exactly the same way that you can edit one that has not yet started. You can change all components of the schedule except for Customer, Schedule Id, and custom first payment fields.
You
can edit a schedule with a status of “Active” and one with a status of
“Suspended.” When the edit option is available, you will see an “Edit”
link under the Action button menu
of the Recurring Payments table,
as shown below.
NOTE: You will not see this link for Payment
Plan schedules that have started, as edit functionality is not available.
Follow these steps to edit a recurring billing schedule that has started:
The schedule will open in full edit mode.
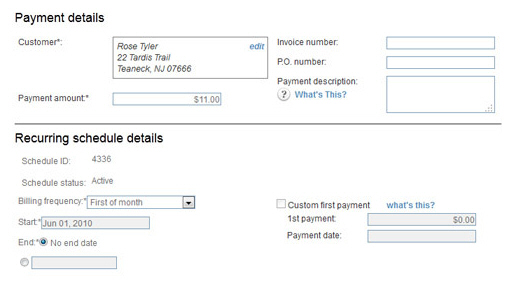
You can make changes to the following fields:
All Payment details fields (Invoice number, P.O. number, Payment Description.)
Payment amount
Billing frequency
Start date
End date
Custom
first payment fields (1st payment amount and payment date.)
NOTE: If there is no Custom first
payment configured, you can enter one. If the payment date has
already passed, you cannot make changes to these fields.
Payment method and/or Account
Notifications (receipt, failure, and pre-notification settings.)
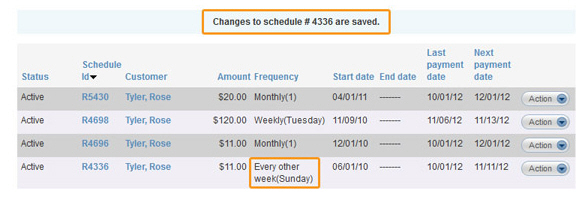
When you’ve finished making changes, click the “save schedule” button at the bottom of the screen to save them. Or, click the “cancel” button to discard the changes.
You are returned to the manage recurring payments screen, a success message is displayed above the table, and the changes you made will be reflected in the table.
NOTE:
When you make a change to the amount, frequency, or payment account on
a recurring payment schedule your customer will be sent an email confirming
the change. Changes to other areas such as email templates, invoice number
or email addresses will not result in a change email being sent.
The email sent is “Edited Recurring Schedule--Bill Payment” for recurring
billing schedules. (See Email Preferences and Templates in Chapter 8
for instructions on how to edit email templates.)