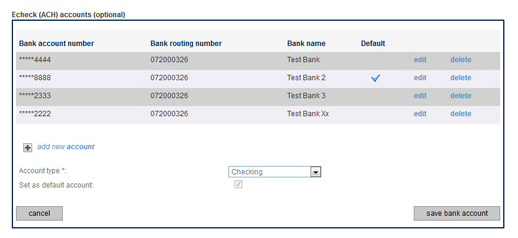
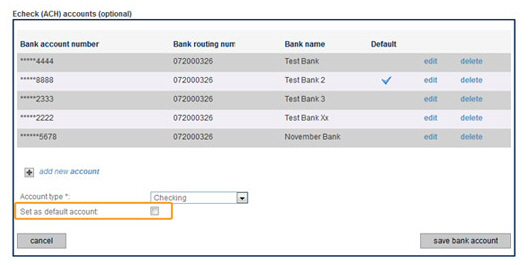
The Bank Accounts section displays a table of bank accounts stored in your account. You can see the truncated account number, the routing number, the bank name, and whether the account is the default. You can store as many bank accounts in the system as you like. Each time you make a payment, you will be able to select the account you would like to use. If needed, you can change the Account type (checking or savings) for a bank account. Any changes to the bank name, routing numbers, or account numbers must happen by deleting the account and creating a new account with the updated information.
Editable fields for the bank account appear under the table of existing accounts.
Change
the Account type field
if required.(You would only do this if it the first selection
was an error-- accounts do not typically get converted from
checking to savings accounts and keep the same account number.)
NOTE: You cannot edit a bank account
to change its name,
routing number, or account number.
If you need to change a bank
name, routing number, or account number,
delete the original account and enter a new bank account using
the new information.
Click the “save bank account” button to save the change, or click “cancel” to discard it, and close the edit section.
To delete a stored
bank account, click the “delete” link and click “ok” in the pop-up
box to confirm the delete.
NOTE: You will only be able to delete
a bank account if there are no unsettled transactions currently attached
to the account. When attempting to delete a bank account attached
to a recurring payment schedule, you will be asked to choose a different
saved account to use with the schedule. If no other bank accounts
are saved, you will not be able to delete the bank account.
NOTE: If you delete the default
bank account, the most recently added bank account will be set as
the new default. If there are no other bank accounts, the next one
added, by either you or your merchant, will be set as the default.
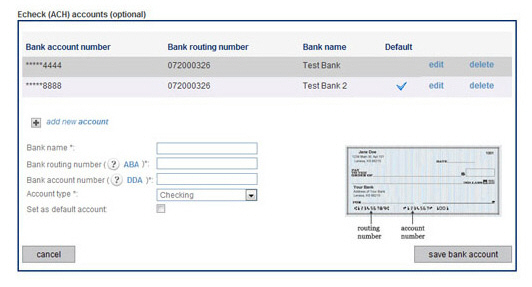
Click the “add new account” link in the Echeck (ACH) accounts section.
New fields will appear under the link, as shown:
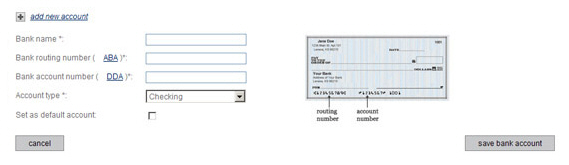
Enter
the 9-digit routing number in the Bank
routing number field.
NOTE: Routing numbers must be 9 digits
and conform to specific banking requirements. The system will
validate the routing number you entered and display an error if
it is not in a valid format.
Enter the bank account number in the Bank account number field.
In the Account type field, select “Checking” for a checking account, or select “Savings” for a savings account.
To
set the bank account you are adding as the default account,
check the Set as default account
box.
NOTE: If the box is checked, when
the new bank account is saved it will be assigned as default in
place of the previous default account. In the table, the new account
will have a check in the Default column, and the previous default
account will not. If the new bank account is the only one attached
to your account it will be set as the default whether or not the
box is checked.
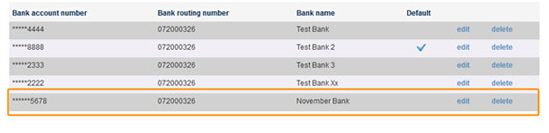
Click the “save bank account” button to encrypt and securely store the account in the system. Or click “cancel” to discard it.
The new account entry section will close, and you will see the account you just added, with only the last 4 digits of the account number displayed, in the list of saved bank accounts, as shown below:
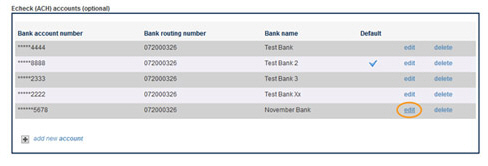
To change the default account to an existing bank account:
Click the “edit” link for the bank account you want to change to the new default.
The bank account is displayed in edit mode under the table.
Check the Set as default box.
Click the Save bank account box.
The bank account is updated in the table with the check mark in the Default column. The default tag is removed from the previous account and it no longer displays the check mark in the Default column.

To add a new account and set it as the default
Click the “add new account” link at the bottom of the Echeck (ACH) accounts table.
The new account fields open under the table.
Enter Bank name, Bank routing number, Bank account number, Account type, and check the Set as default account box.
Click the save bank account button.
The new account is added to the table with the check mark in the Default column. The default tag is removed from the previous account and it no longer displays the check mark in the Default column.
Next Section: Viewing Payment History >
